

Diesel engines need an uninterrupted, air- and water-free supply of clean fuel to run. However, a long list of gremlins can prevent the fuel supply in the tank from reaching your engine in purest form.
Let’s talk about the fuel system and some of the problems that can occur from attrition and error.
The Fuel Supply
Your boat’s fuel supply system can be installed from the top or bottom of the tank.
From the top, the fuel leaves the tank via a pickup tube that extends to within a half-inch of the bottom. Some manufacturers put a screen on the bottom of the tube to keep things out of the fuel system; that screen can become plugged from debris or from the emulsion that forms when water and fuel mix in the tank. If the screen is blocked, then the pickup tubes must be removed from the tank. Removing those tubes is easy if there is good access to the top of the tank, but it’s not a job to do in a rough seaway. Without the screen, any debris will be captured in the fuel filter, where it can be easily removed with a filter change.
Bottom-feeding tanks use a threaded bung near the bottom of the tank that feeds a valve and hose to the engine. This setup creates the danger of a leak draining the tank into the bilge, and the difficulty of repairing any leak between the tank and a shut-off valve. Because this plumbing is usually threaded, normal valve actuation can easily loosen the connection. It is true that the plumbing for a top-feeding tank can leak and siphon the tank’s contents into the bilge, but that’s a far less likely failure.
Fuel leaving the tank creates a vacuum that is relieved via a vent hose. Vent hoses should lead in a gradual, upward slant toward the hull vent, with the inside barb on the hull vent pointing up to discourage water from coming into the vent, and to prevent sloshing fuel from pooling in the vent hose. If the vent hose has a dip, then fuel could remain in the hose, restricting good tank ventilation.
Insects have been known to build nests in vents as well, causing high vacuum in the fuel system. Any vacuum in the system will restrict fuel flow to the engine, and reduce performance.
 Max Parker
Directing The Flow
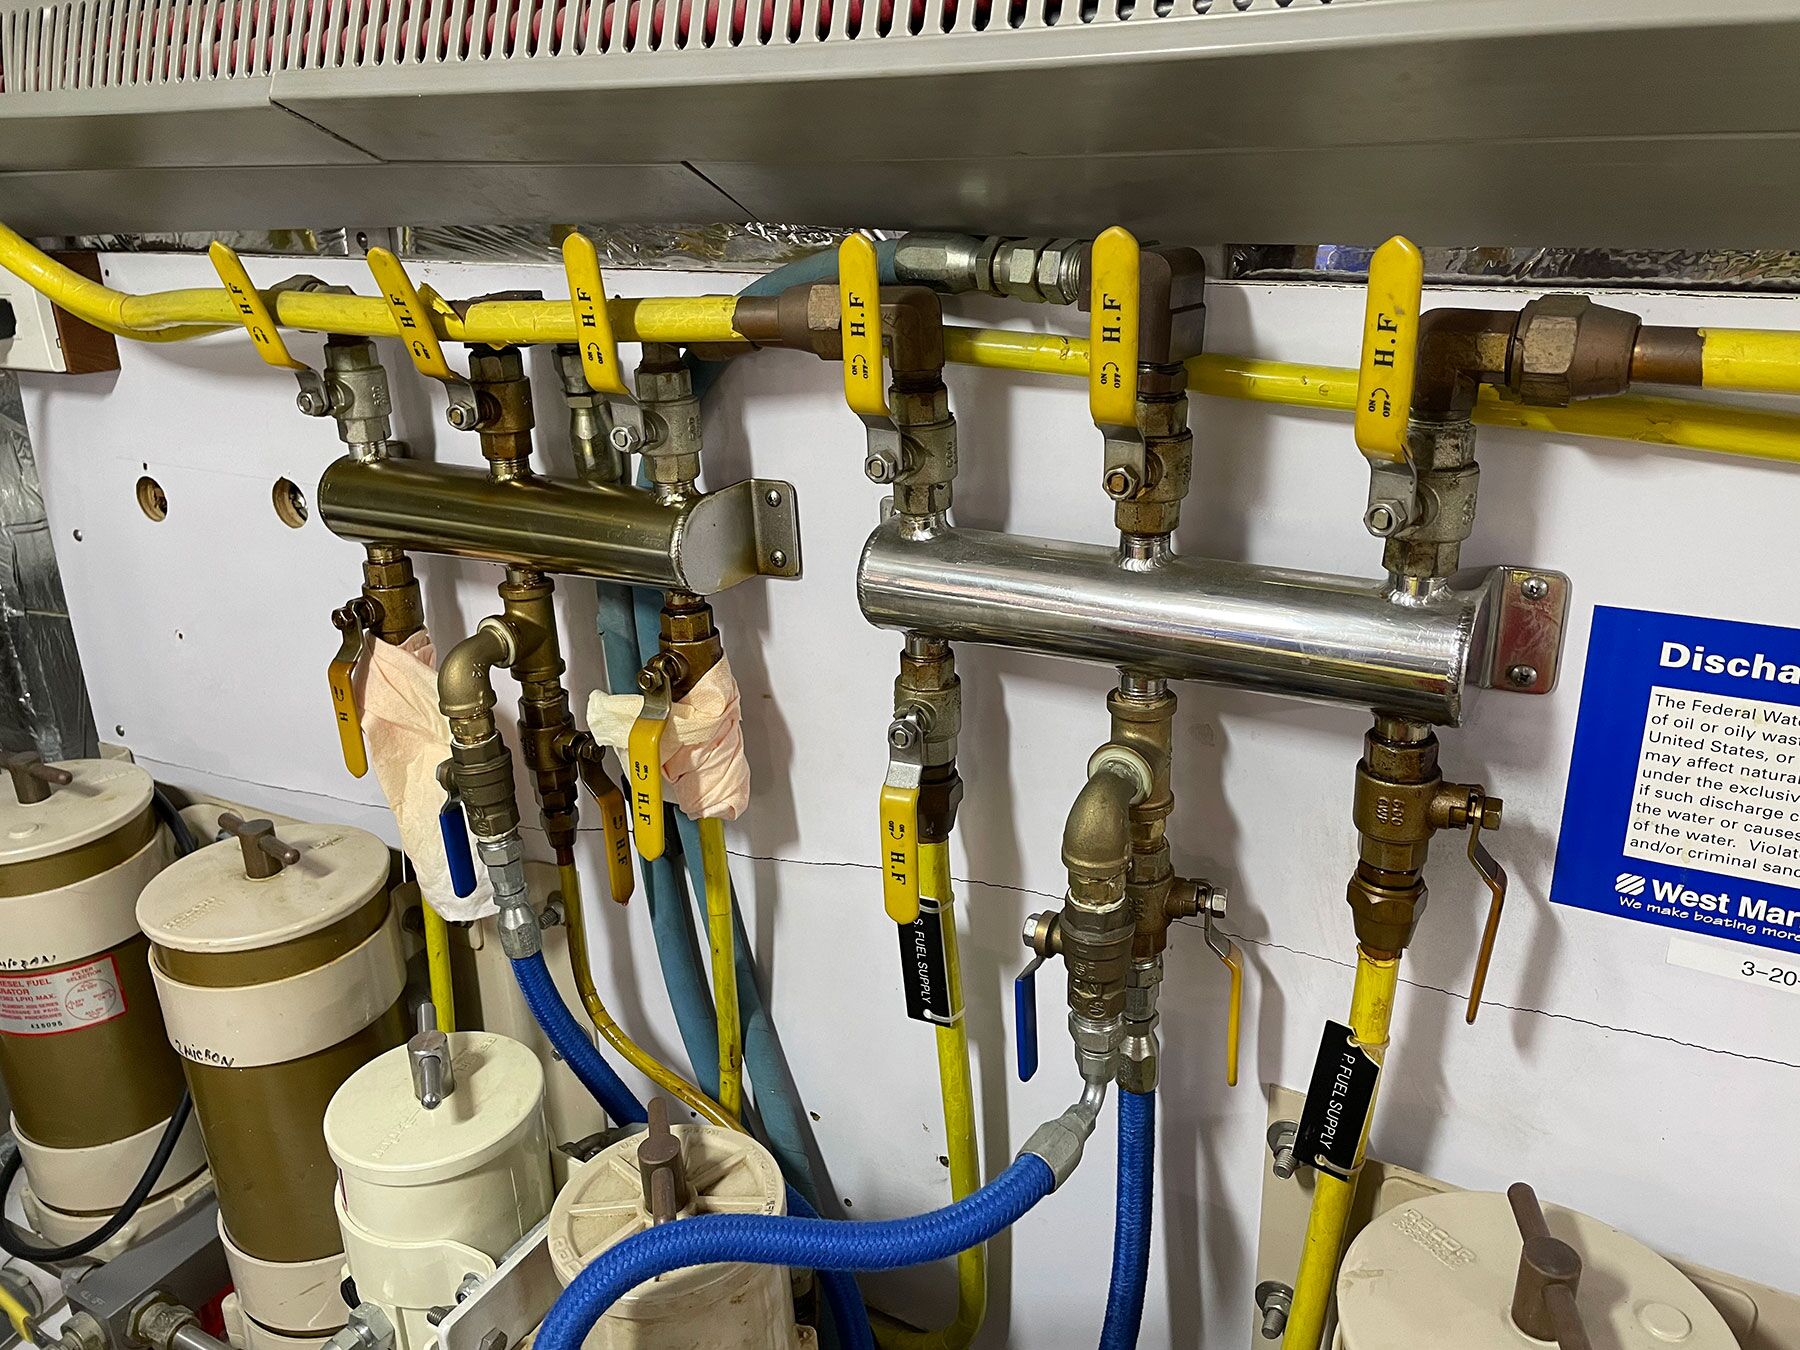
In a single-engine boat with one fuel tank, the fuel travels up the pickup tube, through a valve, through a hose to the primary fuel filter, and then on to the secondary filter on the engine. Adding tanks or engines adds to the complexity.
Diesel engines will also require plumbing and valving to direct excess fuel the engine does not use back to the tanks. Depending on the engine, this returned fuel can be a much larger volume than what the engine actually burns. The excess fuel helps cool the engine and ensures a ready supply for the engine’s combustion needs.
The manifold’s array of valves can be bewildering if not properly labeled. Incorrectly set valves can pull from one tank and return to another, a process that can easily overfill that tank, causing fuel to run out the vent, into the sea.
National Pipe Thread plumbing should be sealed with fuel-safe pipe sealant, and hoses should be sealed with solid-band stainless-steel hose clamps (perforated-band clamps have a much higher failure rate and can damage the hoses). If double clamps are used, be sure that the barb underneath the hose is long enough to support two clamps. A second clamp that does not clamp on the barb can cut or pinch the hose, restricting flow.
All hoses should be labeled A1, which has fire, heat, ozone and alcohol permeation resistance. Note that as hoses age, the inner liner can delaminate and restrict flow under vacuum.
 Max Parker
Clean Fuel
The fuel injection technology on all modern engines requires exceptionally clean fuel. Whenever possible, buy your fuel from a reputable source. If you have any doubts, then take a small sample in a clear jar for inspection before you fill your tank.
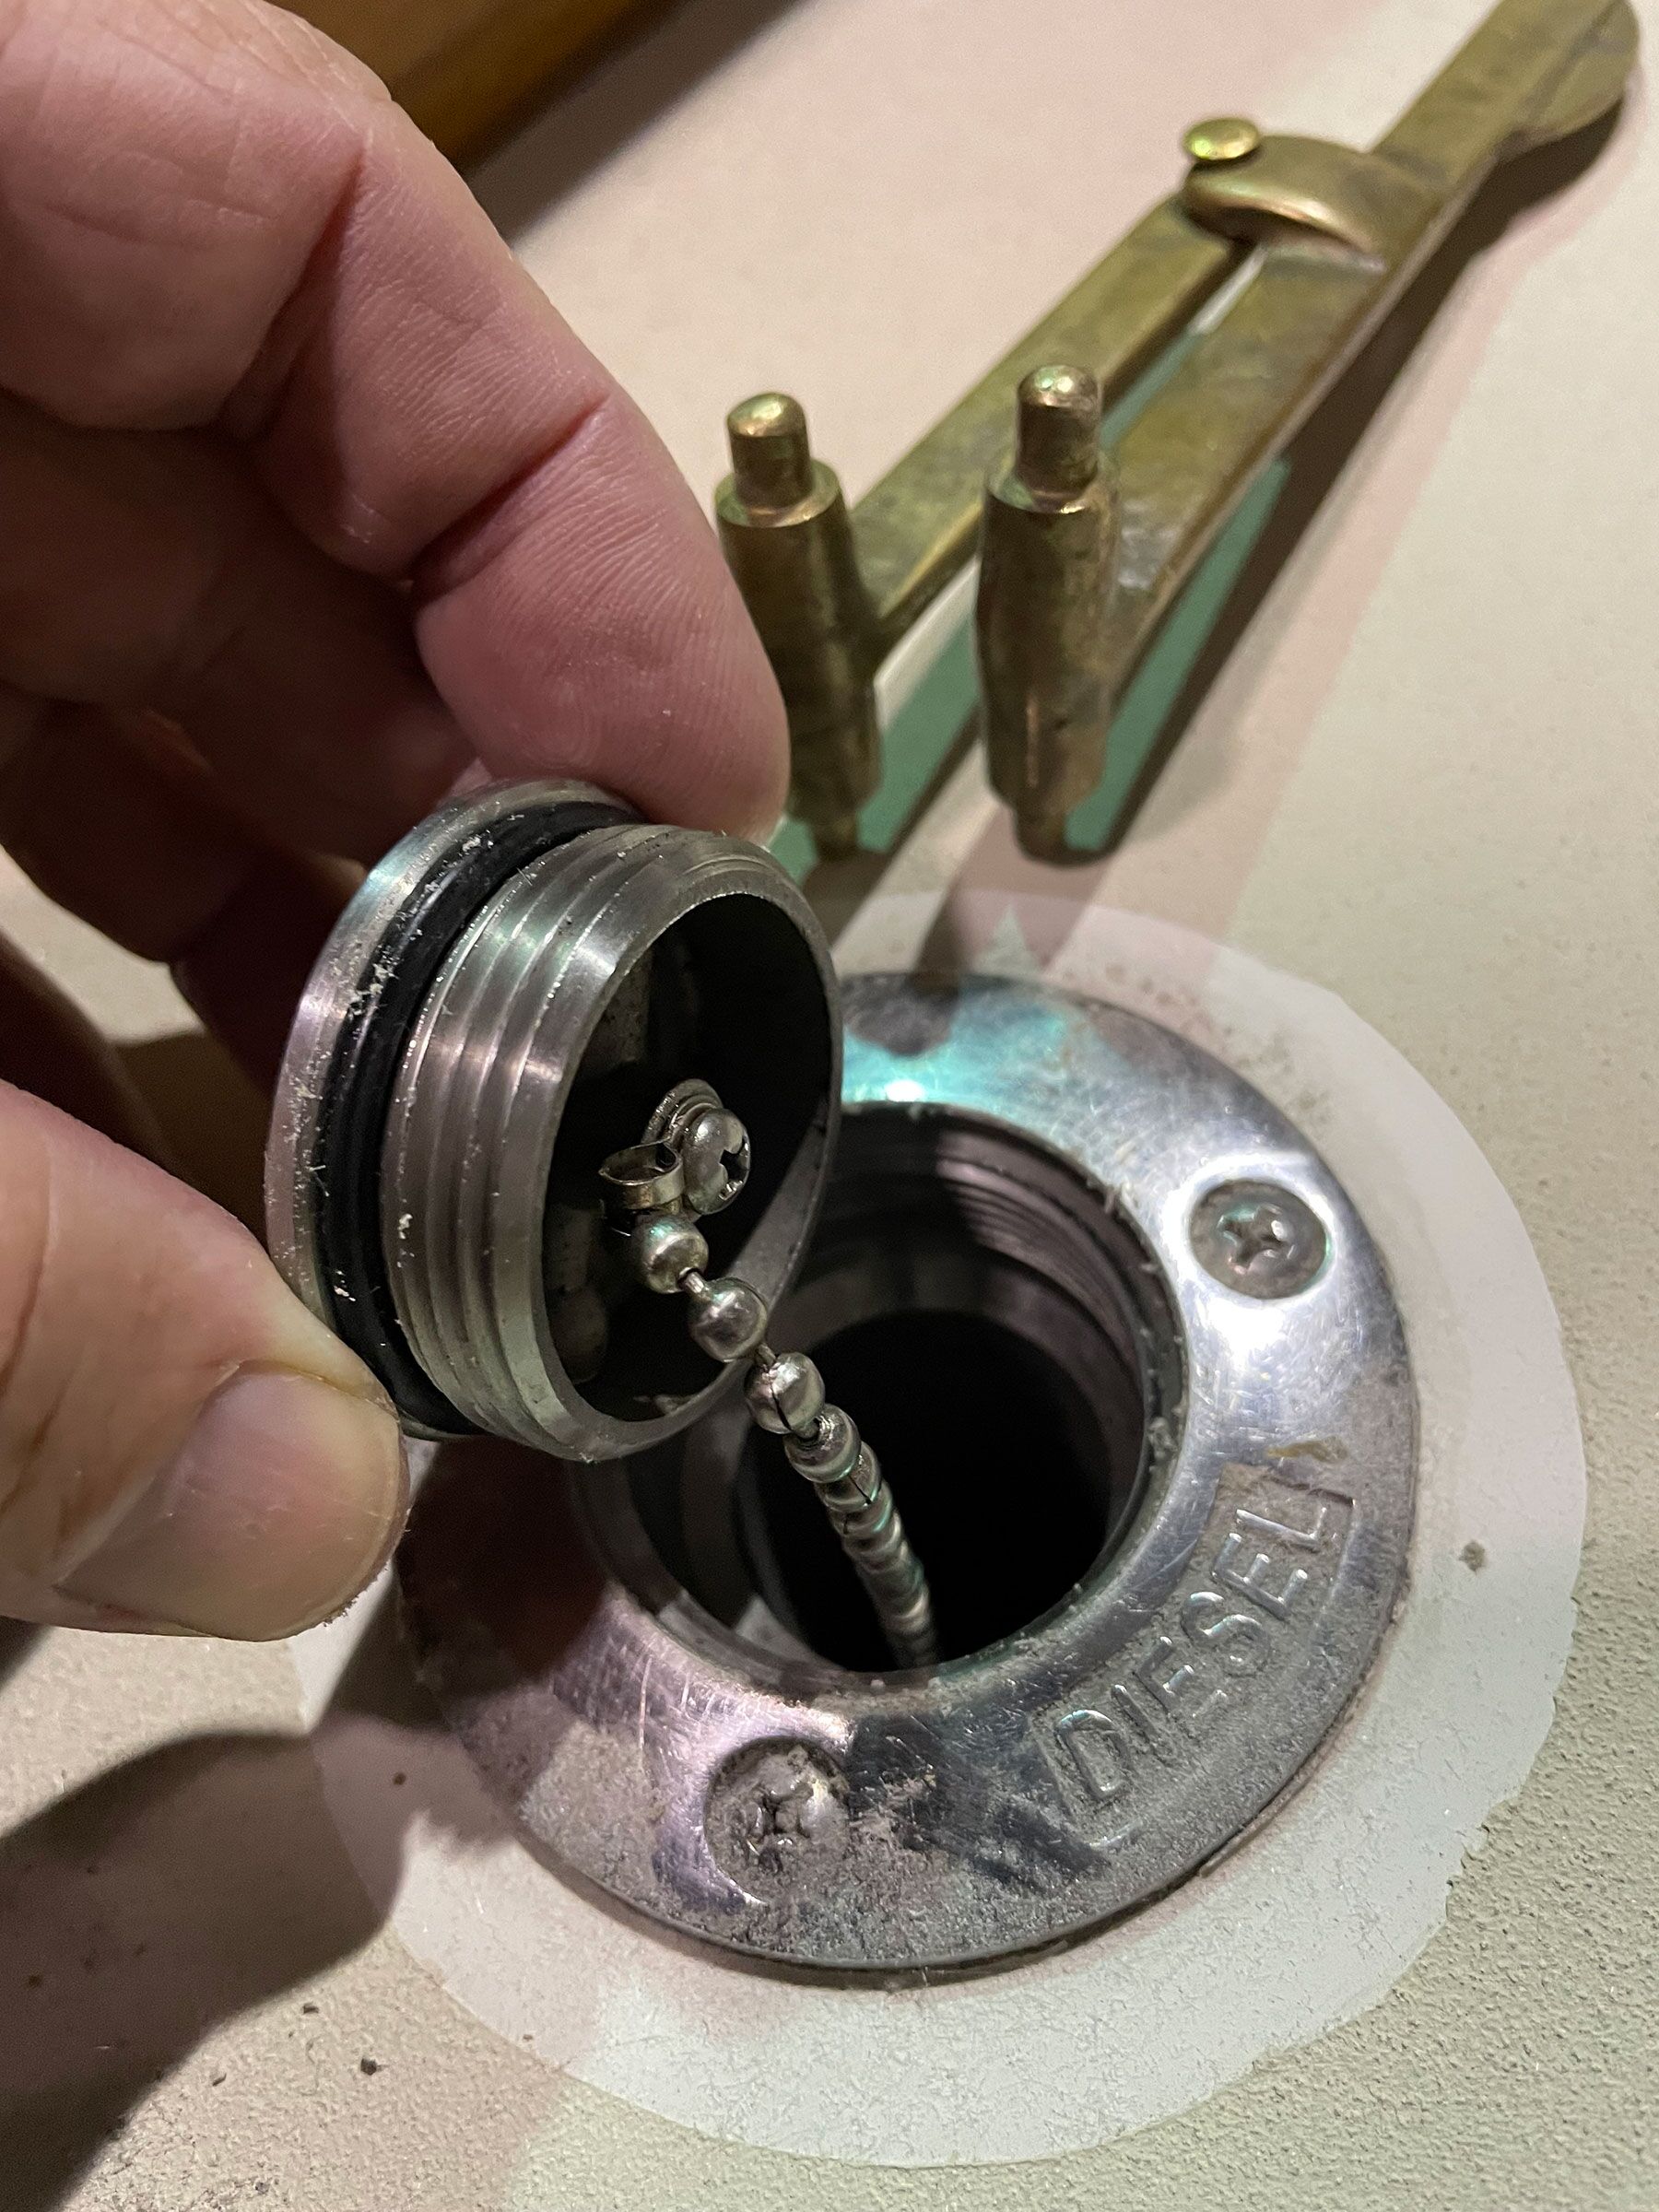
Aboard boats that may not use the fuel within a month, the fuel should be stabilized. Never just punch the stabilizer’s foil seal and leave it attached to the container—a foil seal (or cap, for that matter) that falls into the tank can easily suck into the pickup tube, completely stopping the flow of fuel. It may not be easy to diagnose or find this seal; usually, the engine will shut down as the suction pulls the seal onto the pickup tube, and the engine will often restart because the seal floats away.
Also, follow instructions so that tanks are not overstabilized. If the fuel is not getting regularly used, then several years’ worth of additional stabilizer (depending on the stabilizer and the concentration) can dilute the fuel. That, in turn, can cause smoking and loss of power.
Along those same lines, any unstabilized fuel much more than a year old should be lab-tested for suitability, or removed and replaced with fresh fuel.
One thing that will turn good fuel bad is water. It can enter the fuel through a vent (say, as rain or waves), a leaky fuel fill O-ring or condensation.
Condensation is an issue because the tanks must be vented. Fuel is thus exposed to the air outside the boat. As the temperature of the fuel changes during the day, it will expand and contract. This will make the tank act like a lung, of sorts, pulling moist outside air into the tank, where it can precipitate and drop into the fuel, eventually separating and sinking to the bottom. This trapped water becomes a fecund garden for all manner of microbial growth. Over time, the water can also become acidic, and can cause pitting and corrosion in metal tanks.
 Max Parker
Filtration
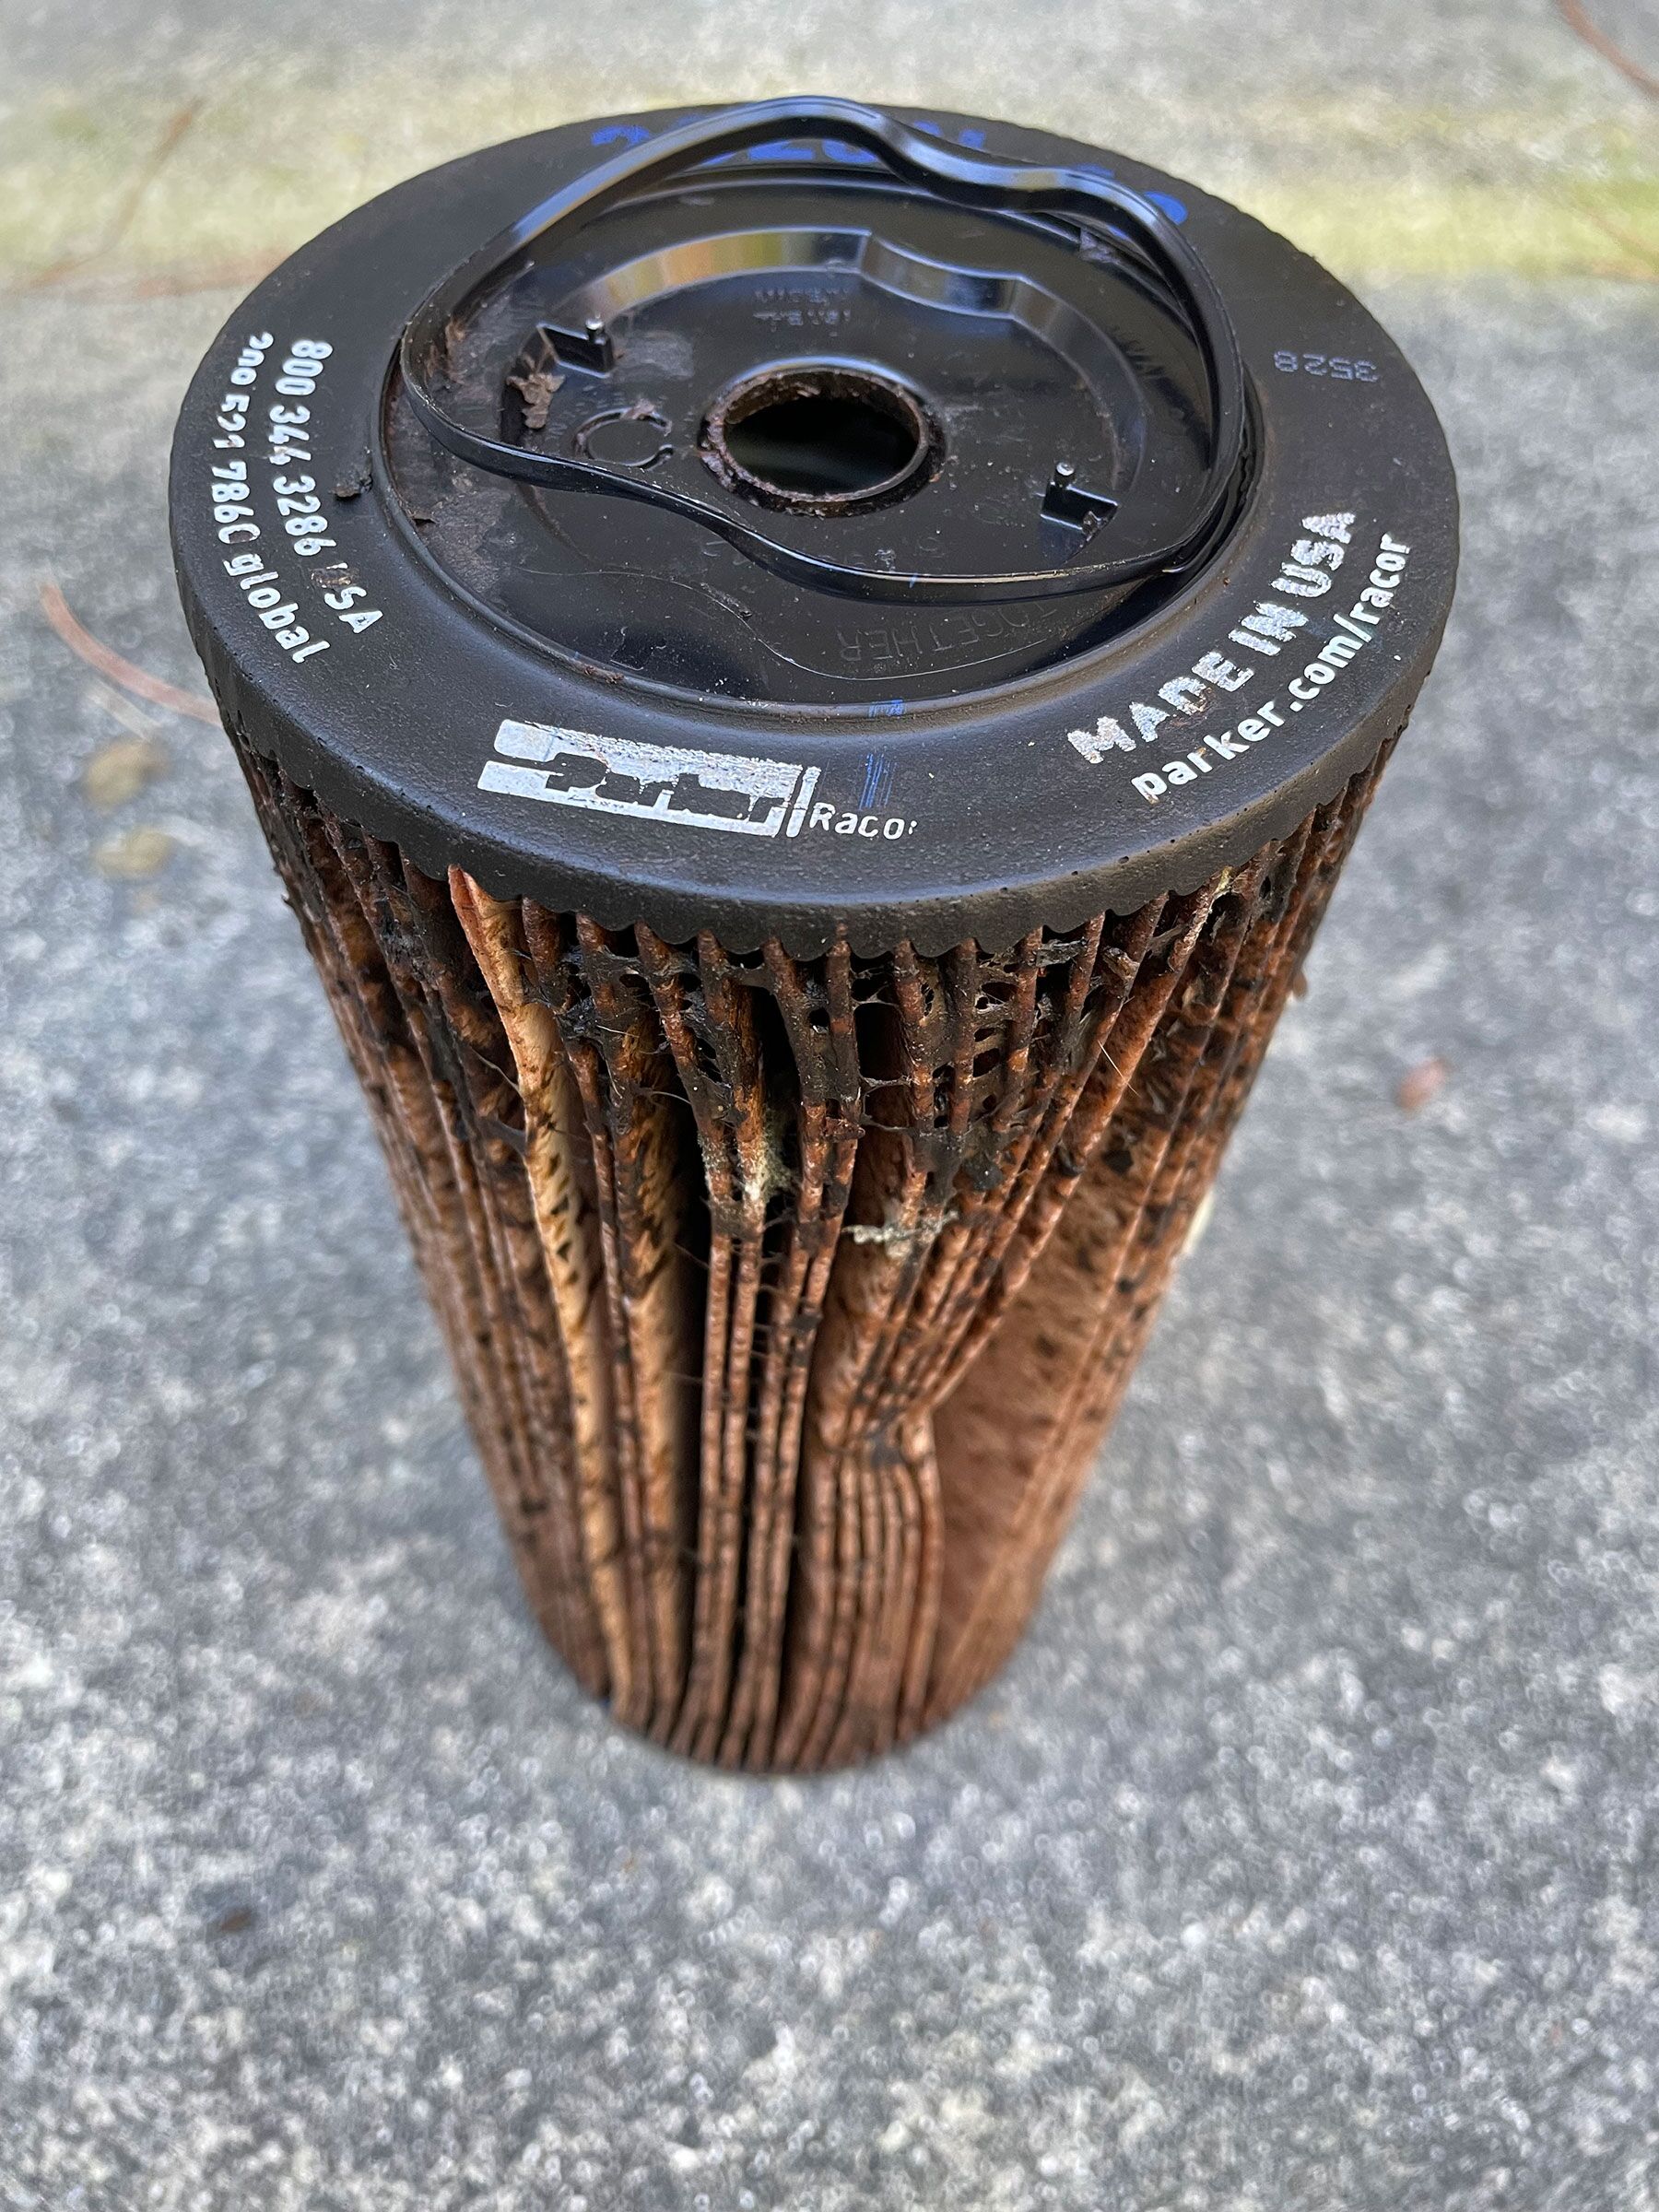
All diesel engines come with an engine-mounted fuel filter. Most boat fuel systems also include a larger-bodied pre-filter. It’s the primary filter, since fuel reaches it first. The filter on the engine is the secondary filter.
The micron rating on the primary filter should be coarser than on the secondary filter, to more effectively filter the fuel. Note that the terms coarser and finer are relative, since the range is between 2 microns and 30 microns (a human hair is about 70 microns). Typically, the manufacturer-supplied secondary filter will be 2 to 7 microns, and the primary filter will be 10 to 30 microns. Good primary filters will also separate out any water, which will collect in the bottom of the filter to be drained out. The filter media is folded to increase surface area, and is treated with a chemical to resist water.
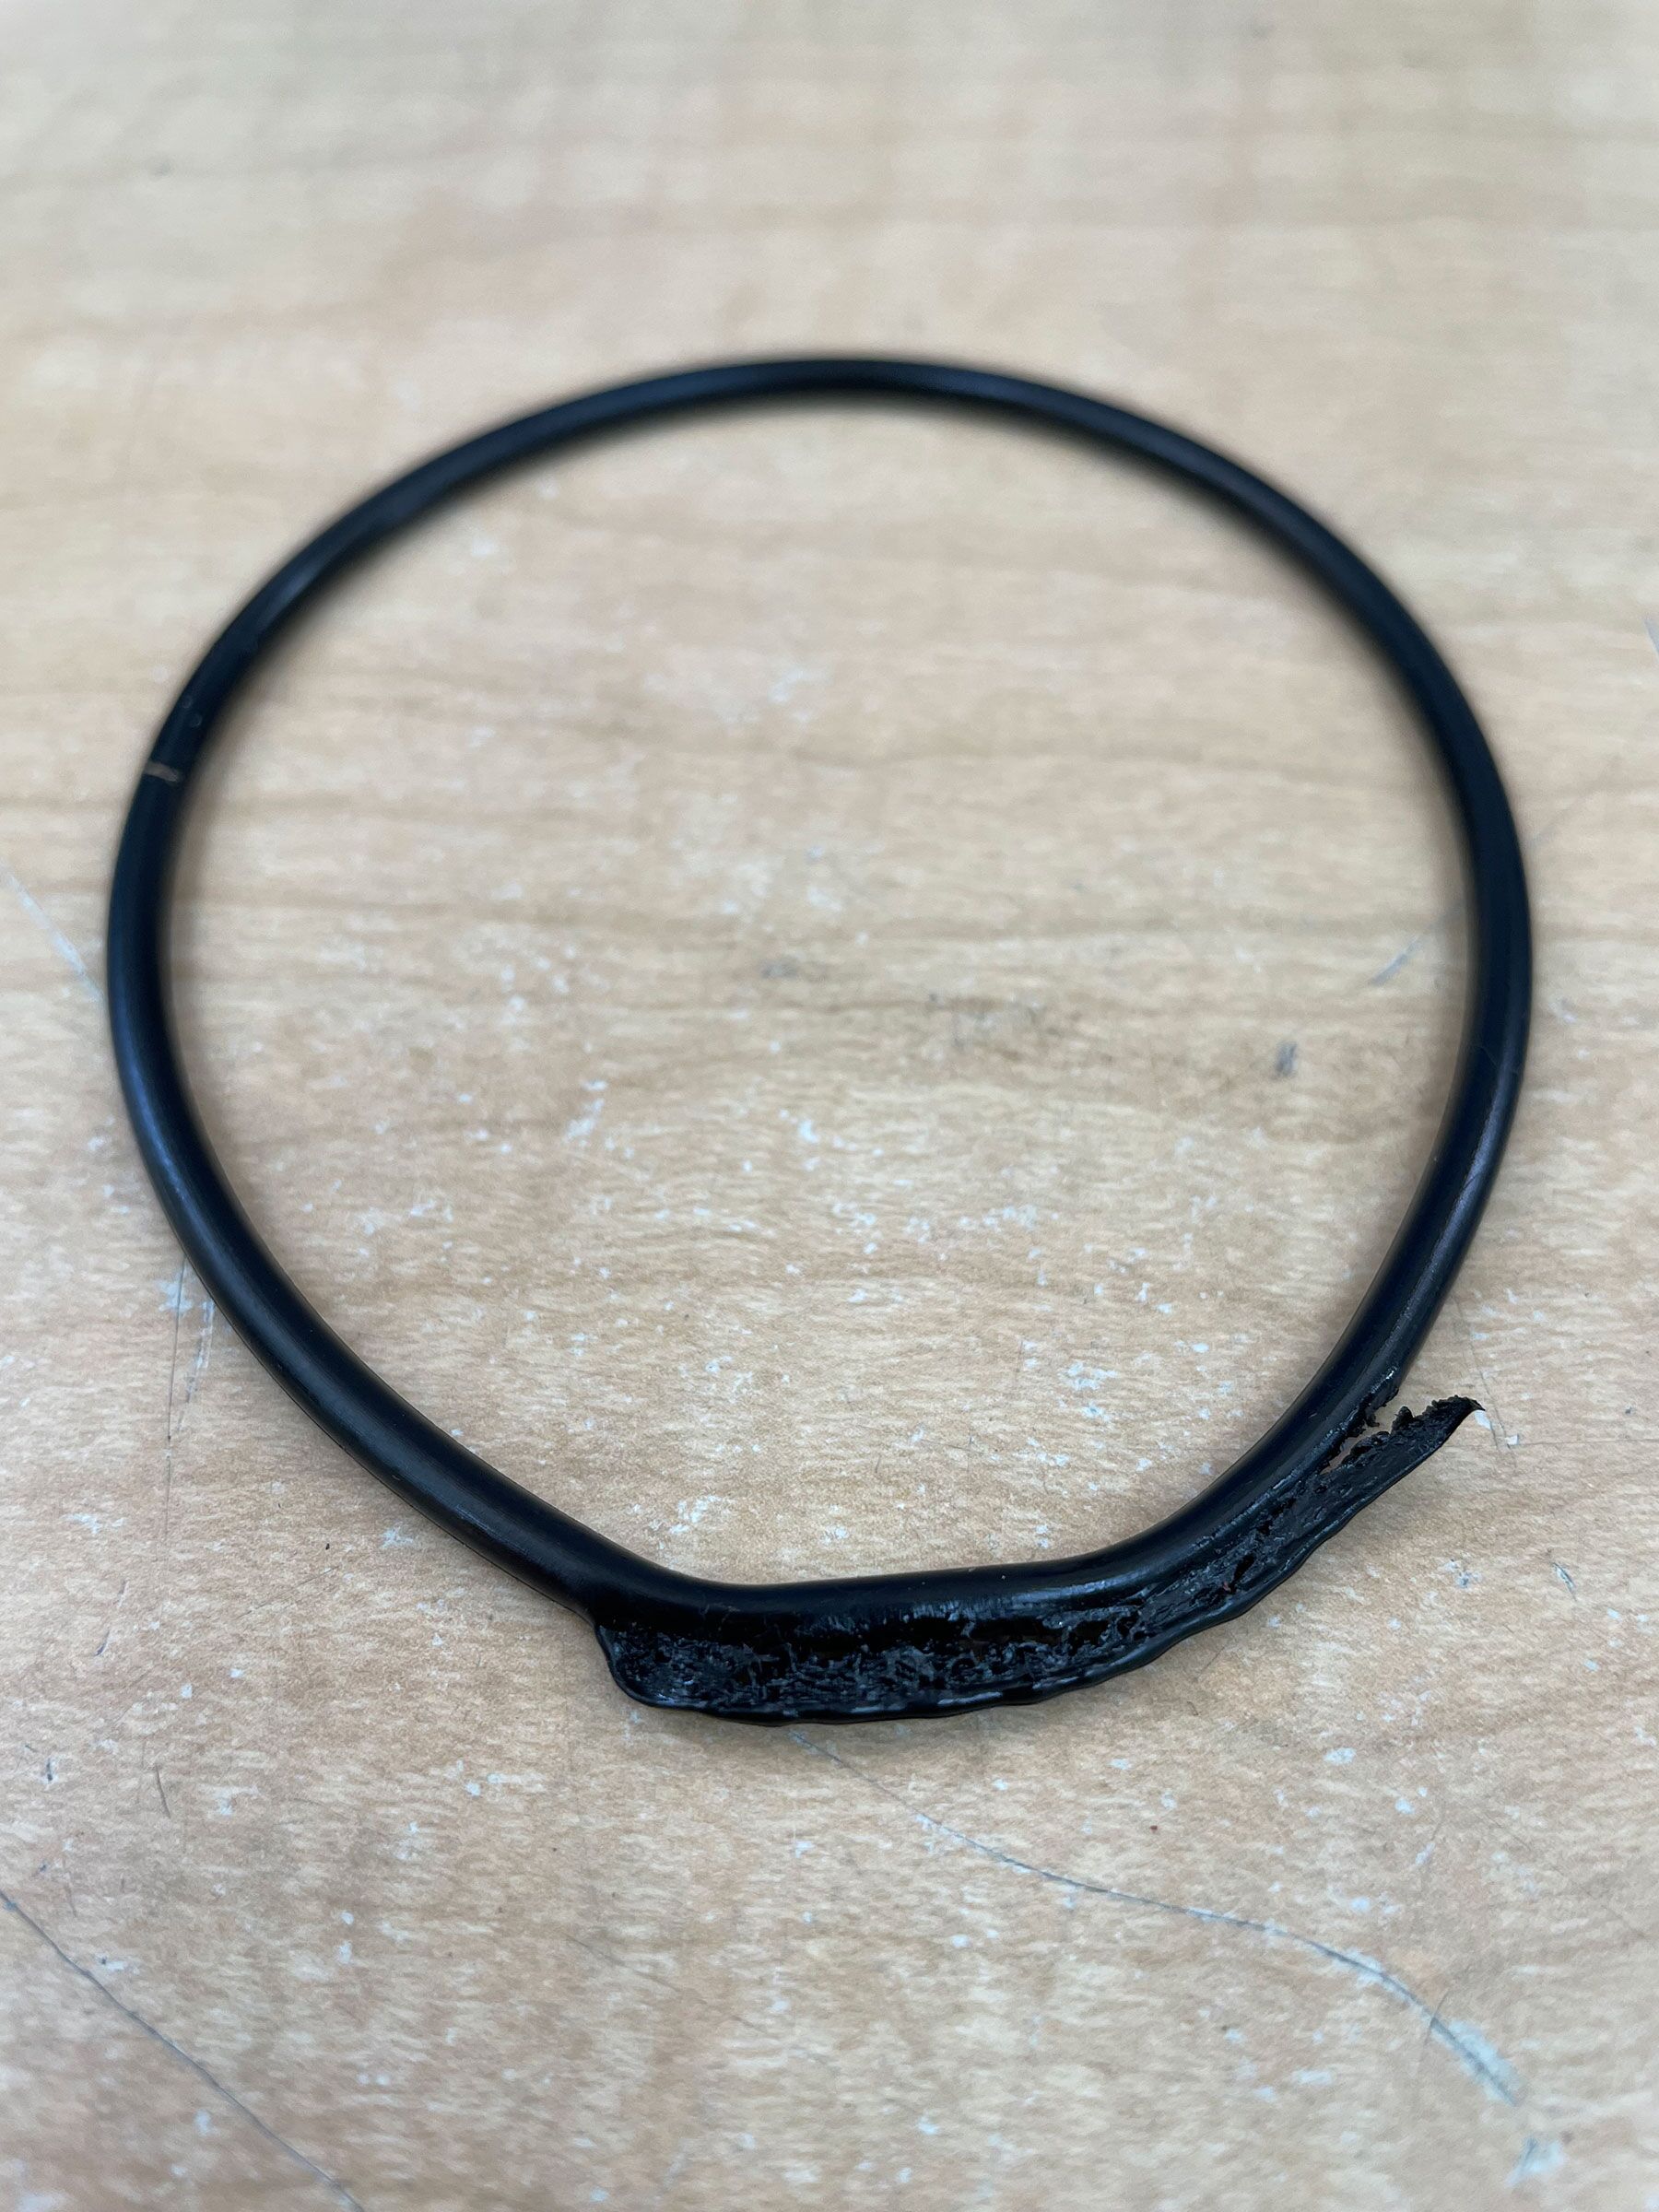
Because fuel filters can be disassembled for cleaning and element replacement, they are filled with O-rings and seals. These seals can become failure points if they go missing or are damaged.
Each plumbing fitting also needs a functioning seal or thread sealant to prevent leaks or air infiltration.
 Max Parker
Vacuum Gauges
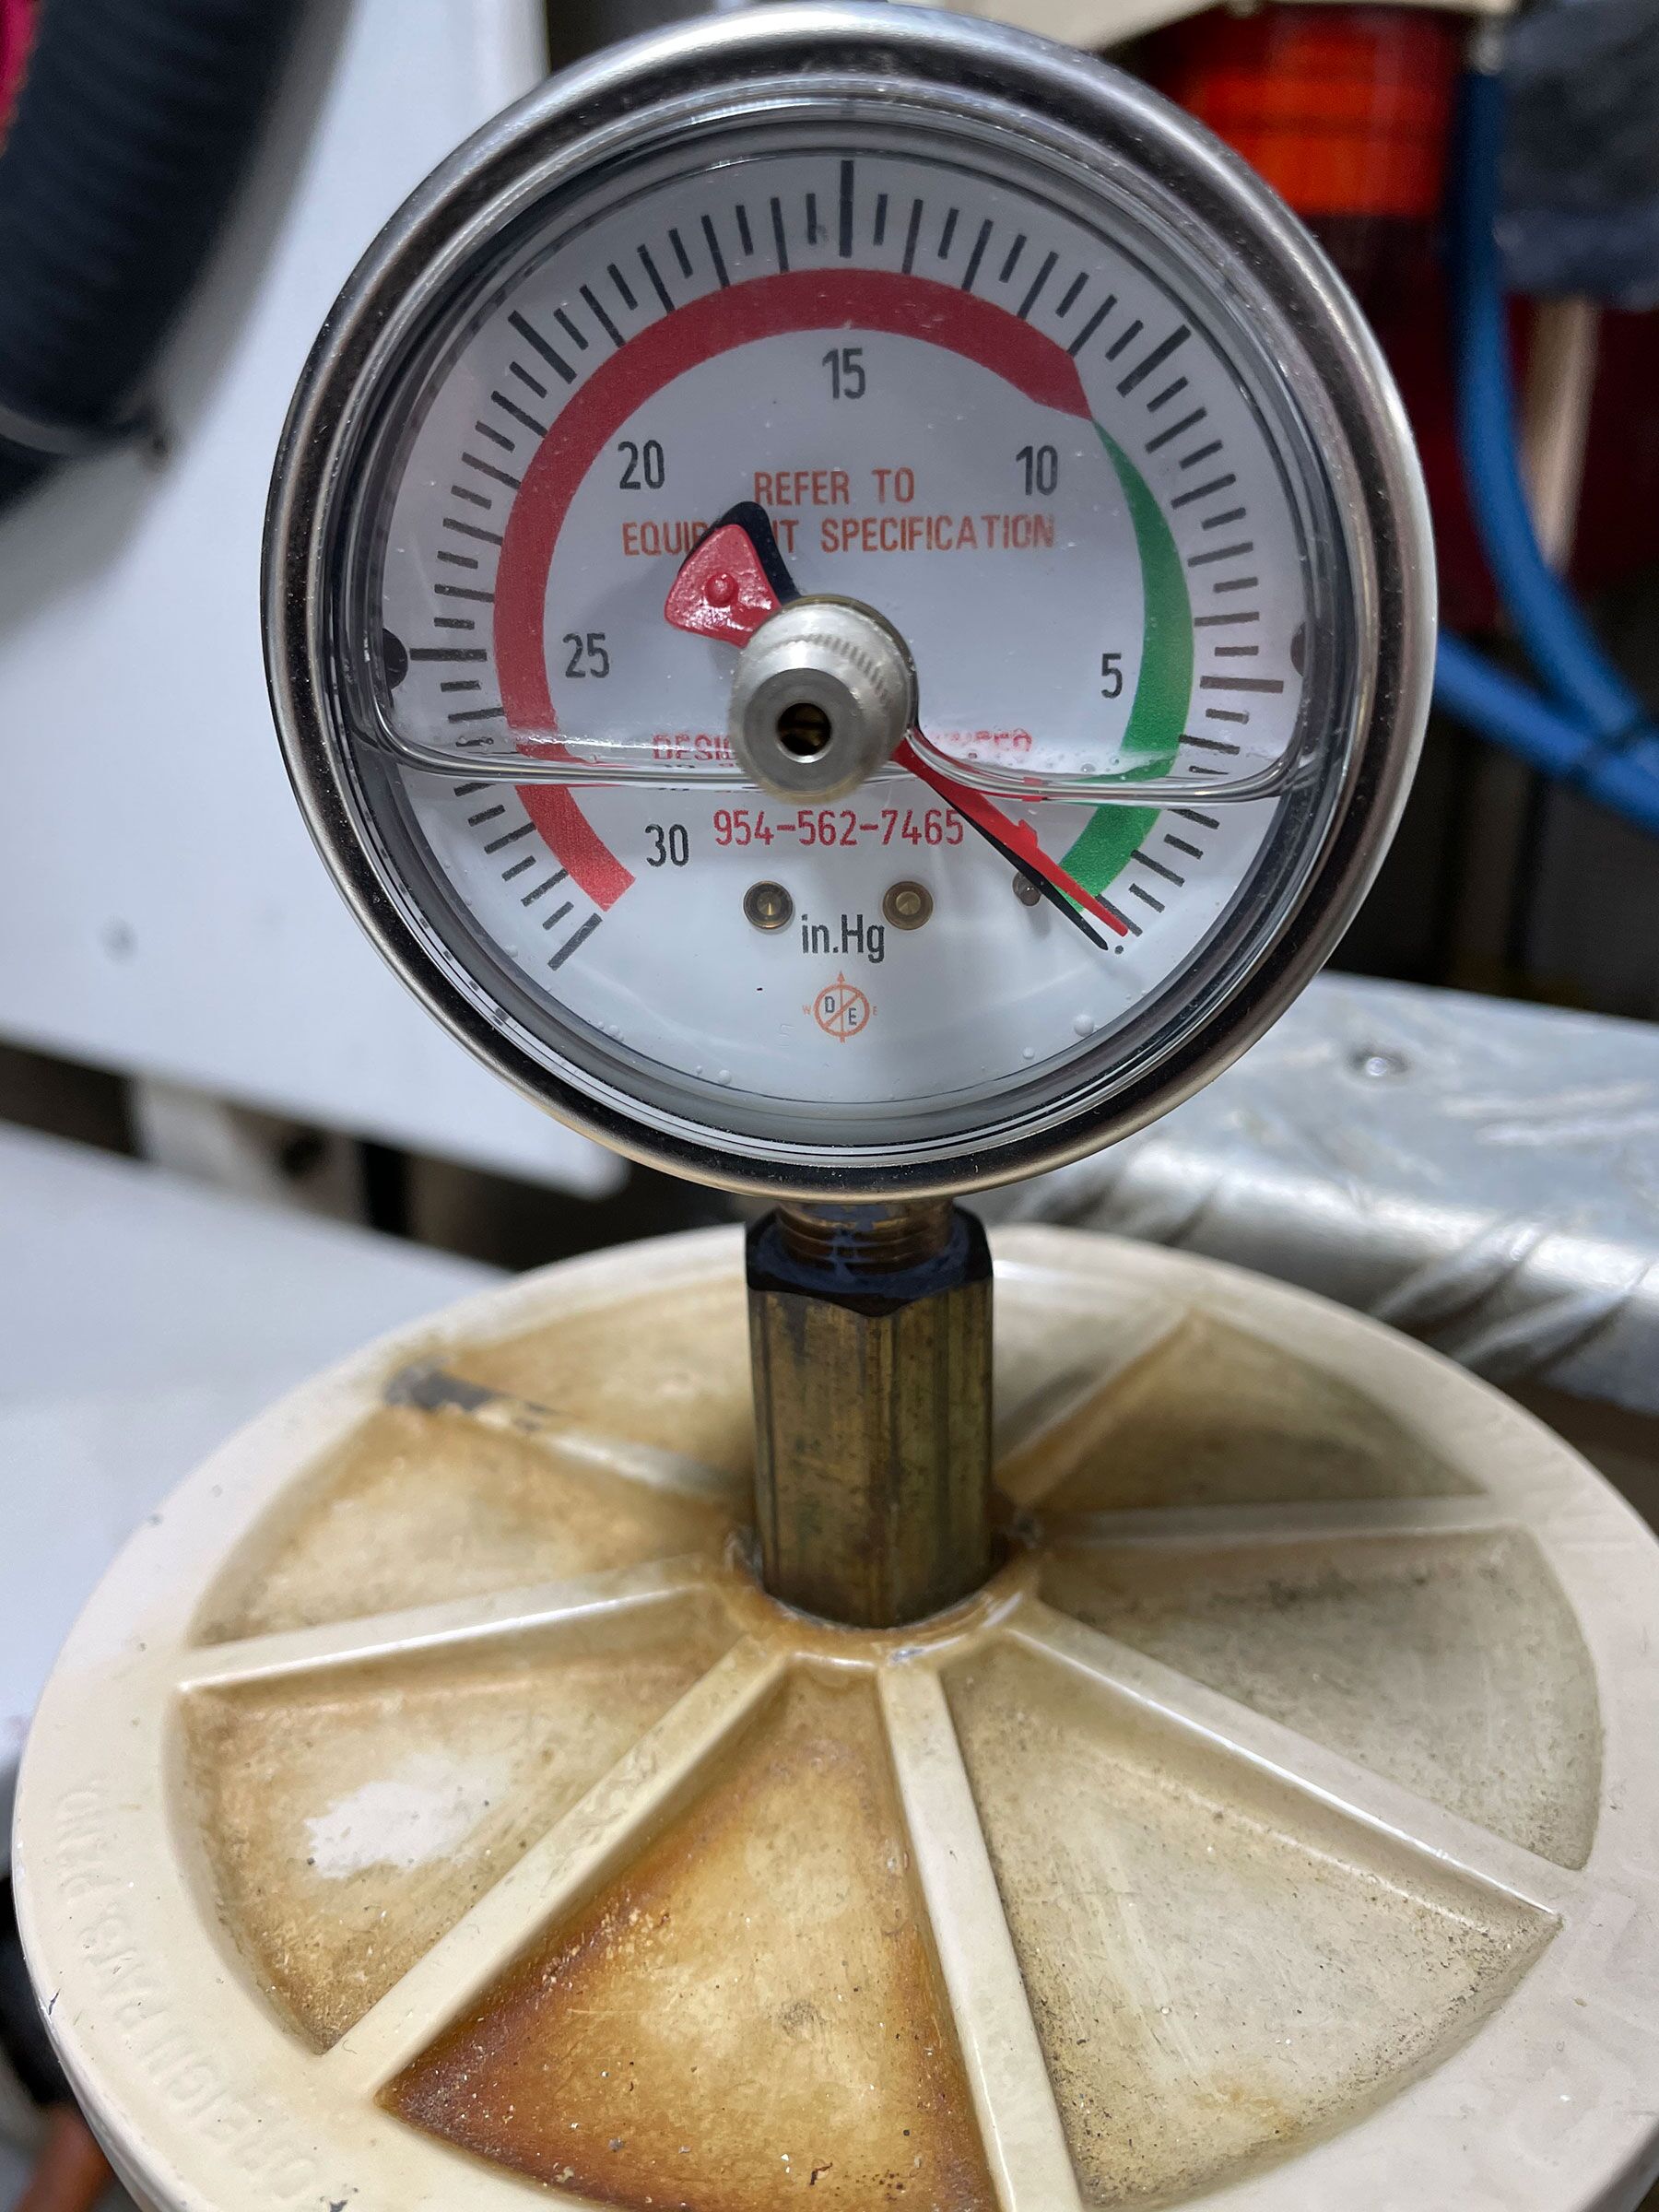
To properly diagnose a reduction in engine performance, you must have a way to examine fuel flow. This is where a vacuum gauge comes into play.
When an engine demands more fuel than the system can supply, the pump creates vacuum pressure between the tank and fuel pump. A vacuum gauge quantifies the amount of vacuum in inches of mercury (Hg). High vacuum from a clogged filter or plugged pickup tube can shut down any engine. High vacuum can also make a marginal seal in a filter or fitting suck air into the fuel system where it wouldn’t under normal vacuum.
The most-common and least-expensive way to gain a vacuum gauge is to install it on your primary fuel filter. In this location, it will monitor the condition of your filters and plumbing back to the pickup tube in the tank; it will not monitor the plumbing from the gauge to the engine.
Traditionally, if you wanted to know the condition of the fuel vacuum at the helm, you had to plumb a hose or tube from the filter to the helm, and then install a remote gauge. Now, NMEA 2000 sensors will display this information on your multifunction display. If you combine those sensors with an NMEA 2000 fuel flow sensor and a tank level sensor, you can create a powerful fuel monitoring and diagnostic system.
 Max Parker
Troubleshooting
Where do you start looking if your engine dies? Step one would be to check your vacuum gauge. Is the vacuum high? And how do you know what high is? Every engine has a different value, and that value will change based on the load on the engine at the time.
At idle, the engine may not pull enough vacuum to create the leak. Prior to any failure, it is a good idea to perform a simple test. Start your engine, go into the engine room, and isolate the fuel supply to a single tank. Shut the fuel supply valve and listen to the engine while watching the vacuum gauge. When the engine starts to slow, note the vacuum reading and open the fuel valve again. This test will let you know the idle-speed vacuum reading that will stop the engine.
Obviously, if you’re monitoring your vacuum readings regularly, you’ll want to remedy any dirty fuel or filters long before vacuum readings reach this value. This is also a good test to confirm that the vacuum gauge is working. Needles have been known to stick at zero, masking any future vacuum problems.
If the vacuum readings are OK, then air might be getting into the system. Have the filters been changed recently? It is easy to pinch, roll or split the sealing O-rings in most filters. Filter bodies can have multiple O-rings, with each one being a potential leak source. It is also easy to have an O-ring stick in place in a difficult-to-see housing.
It is also possible that a damaged O-ring may leak air in, but not leak fuel out, making the troubleshooting harder. To confirm an air leak, it is possible to install a short piece of clear hose temporarily in the fuel supply, to visually check for bubbles. This hose can be moved to different locations in the supply to pinpoint the offending device.
The other possibility for failure after a filter change comes from the process of bleeding out any air that was introduced during the change. Many engines are self-bleeding, as long as the fuel hoses and filters are full of fuel. A common-rail engine’s fuel plumbing operates at extremely high (and dangerous) pressures and should not be opened with the engines running. Non-common-rail engines have bleed screws in the on-engine fuel plumbing. These are typically at high points, or before fuel pumps or injectors.
Bleed screws are sealed with crush washers that conform to the screw and plumbing to make a seal. An overzealous mechanic can squeeze the washer until it splits and fails to seal properly, or can strip the threads on the screw or in the engine, allowing air into the system or fuel to leak out.
If you have searched from tank to engine and have not discovered the problem, then try filling a container with clean diesel fuel. Remove the boat’s fuel hose where it attaches to the engine. With as short of a piece of fresh hose that will reach the bottom of your fuel container, use the manual pump on the engine to draw fuel into the hose and bleed the engine. If you have a hose with an outboard squeeze ball matched to your fuel hose size, all the better, as this will facilitate bleeding the system.
Once air is out of the engine, it should start and run. Unused fuel from your source will return to your boat’s tank, so be sure there is room in the tank (this technique will bypass all the plumbing and filters back to the tank). If the engine runs fine, then try moving the temporary hose to the input on the primary filter, then to the fuel manifold, and then to the pickup tube. If the engine stops running at any point, you have narrowed down where the air is entering and can start disassembling that component to find the flaw.
As fuel prices continue to climb, we owe it to ourselves to protect every precious drop. Keeping the tank clean and free of water, and regularly and carefully changing filters, will keep your engine happy and reliable.
This article was originally published in the July/August 2022 issue.