


Shaft seals—at the junction between seawater and spinning propeller shafts—can cause problems that need immediate attention.
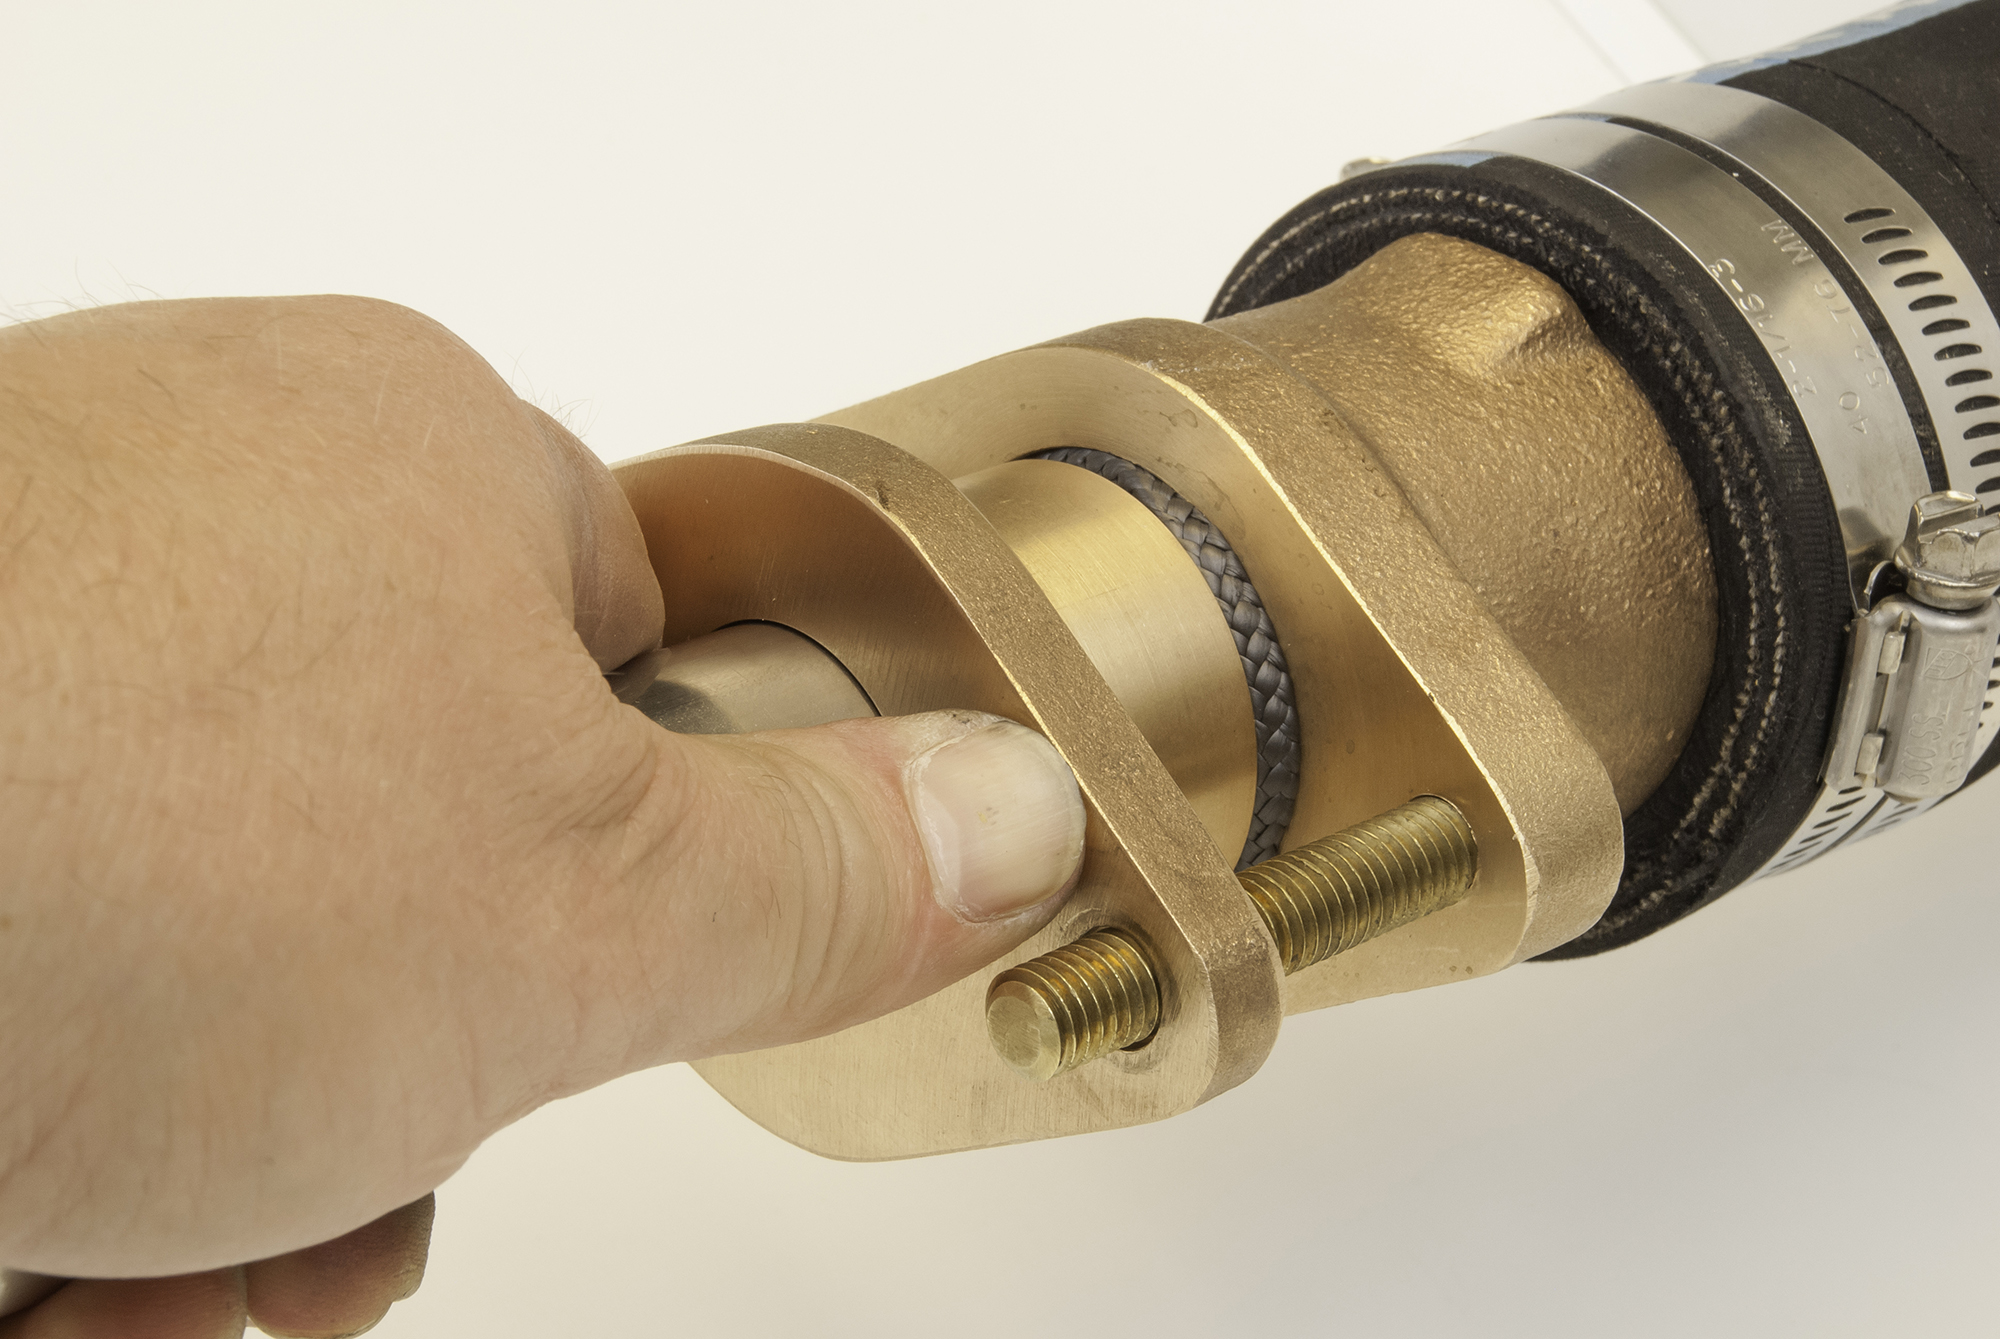 Photo: Vincent Daniello
Maybe you’ll notice the bilge pump running for a while, or maybe not. The alarm indicating high bilge water is hard to miss. Water gushing into the engine room, through what used to be a propeller shaft seal, is the ultimate eye-opener.
With adequate maintenance, shaft seals seldom fail so severely, but these thin lines separate boats from the sea on large openings that lurk far beneath the waterline. Shaft seals fall into three categories: traditional stuffing boxes, face seals and lip seals. Each of these has its advantages, but none are maintenance-free.
“Checking stuffing boxes or shaft seals is near the top of my list during engine-room checks,” says James Knight, president of Yacht Tech in Palm Beach Gardens, Fla.
His company mostly services long-distance cruising boats, whose shaft seals demand close scrutiny and might require underway repairs. Here’s a look at the different types of shaft seals and what to keep a close eye on.
Stuffing Box
These stout, bronze castings compress waxed cotton or synthetic packing tightly around turning propeller shafts. They’re virtually indestructible.
They also leak seawater. “You want them to drip, even at the dock,” Knight says, “or the water in the stern tube goes stagnant.”
Once seawater oxygen levels drop, stainless steel can pit, especially higher-iron Aquamet 17. (If a magnet sticks to the shaft, it’s more likely to corrode over time, Knight says.) Two or three drops a minute aboard an unused boat suffices, but beware of silt clogging the packing at some marinas. It stops that rhythmic drip.
While underway, at least a drop every few seconds keeps packing cool. “If you can’t rest your hand on the stuffing box while you’re running, it’s too hot,” Knight says. That’s around 120 degrees when using a handheld infrared thermometer, and also close to where packing might melt and fail. Overtightened or improperly packed stuffing boxes are common culprits. Alignment issues can also press and overheat packing on one part of the shaft’s circumference.
As stuffing-box packing wears and weeps over time, tighten the gland to just the right drip while underway, Knight says. Or, snug it a bit at a time between multiple voyages.
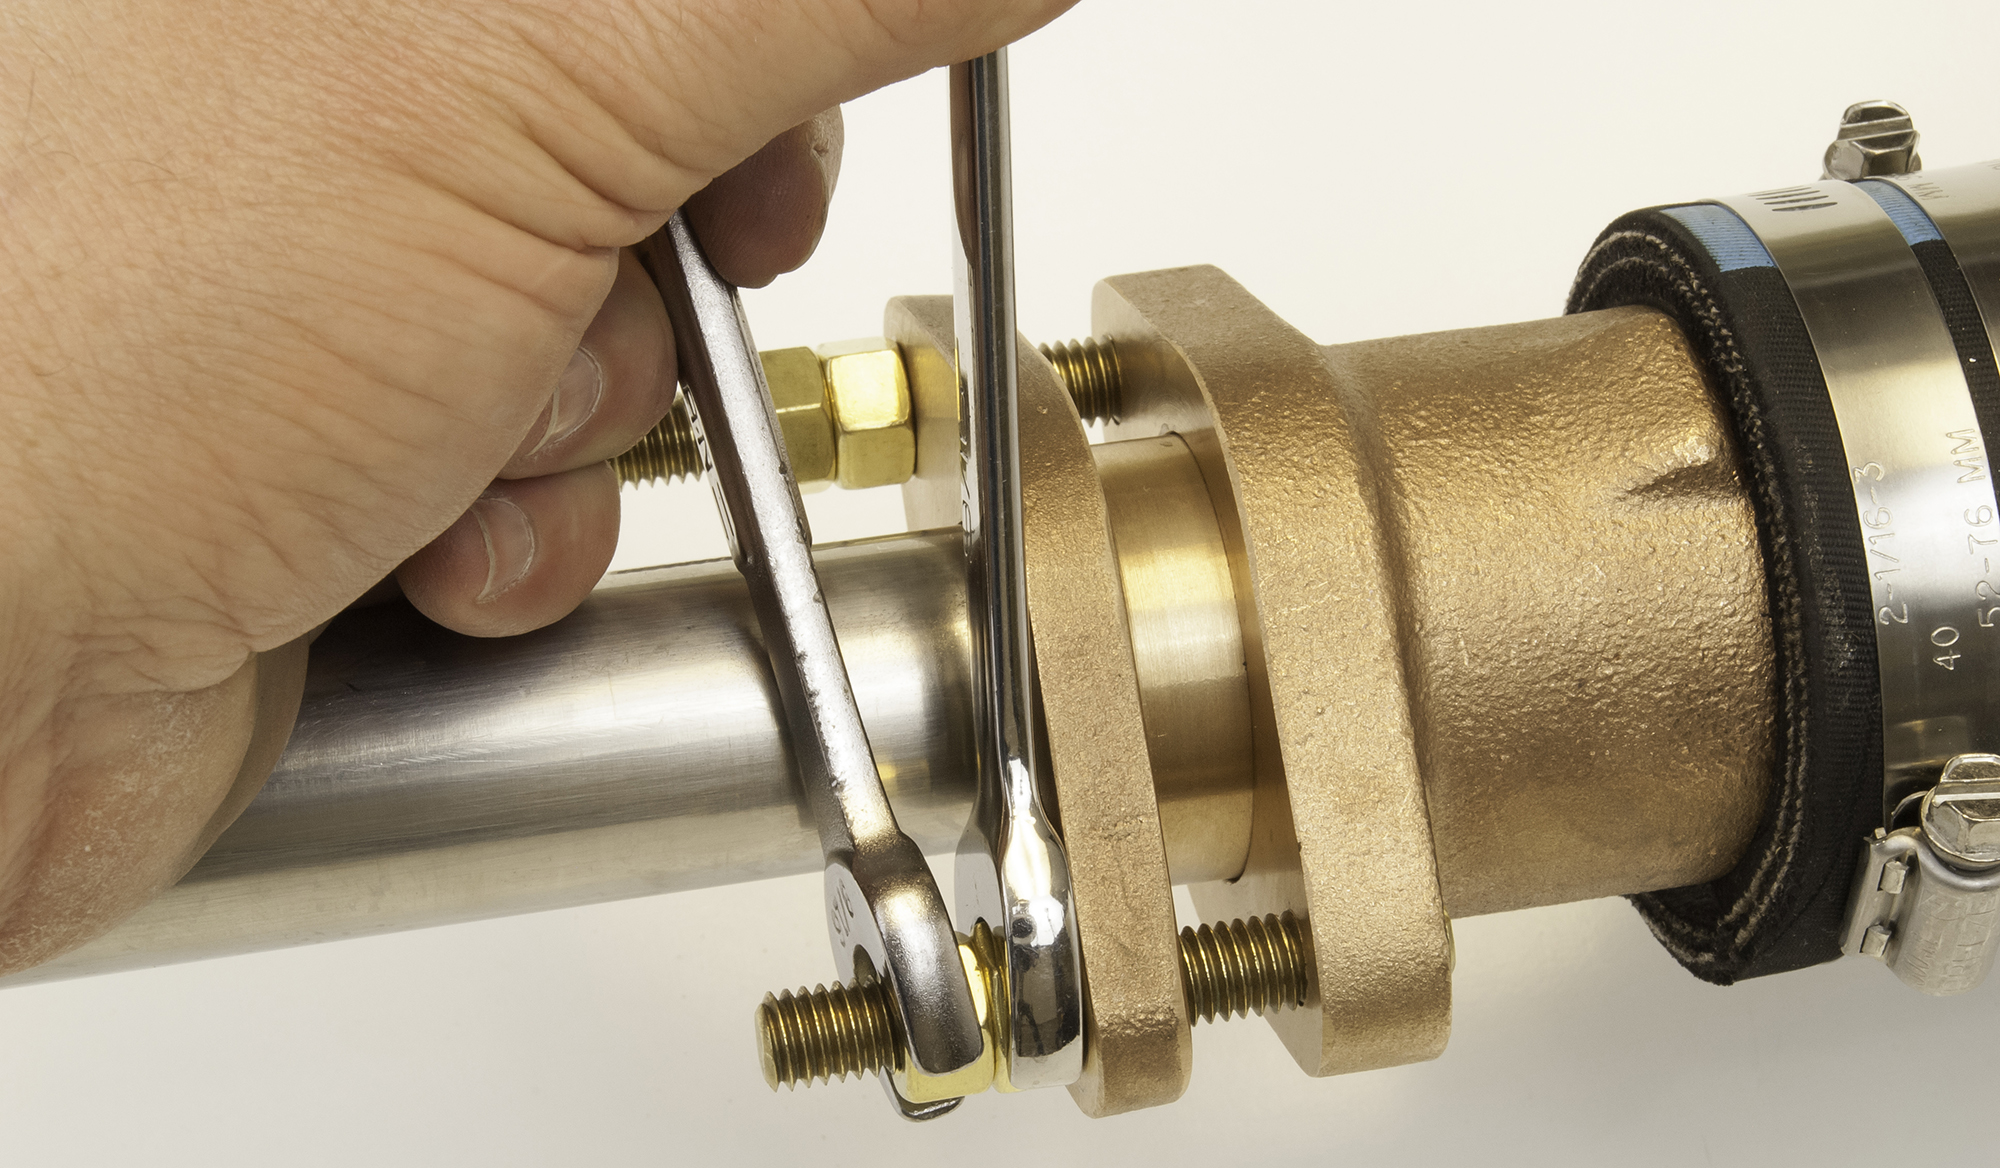
On some stuffing boxes, two opposing pipe wrenches unlock the two nuts, and then both nuts turn together to compress the gland. Be cautious, though, with large wrenches near spinning shafts.
With other stuffing boxes, a stud with two nuts on each side of the propeller shaft draws the gland closed. Be sure to tighten both sides evenly so the gap between the two bronze sections remains exactly parallel.
Repacking can be done in the water, or offshore in a pinch, Knight says. First, clean the bilges of pump-clogging debris and test the pumps. Clean the shaft, and then size three rings of packing to fit perfectly around the shaft, making 45-degree cuts with a sharp razor or knife where ring ends meet. A whisker too short is better than too long, since any extra length makes circles too large to fit into the tight gland cavity. Knight taps the square packing slightly thinner with a plastic mallet on a cutting board before cutting his rings, so they more easily fit inside the narrow opening.
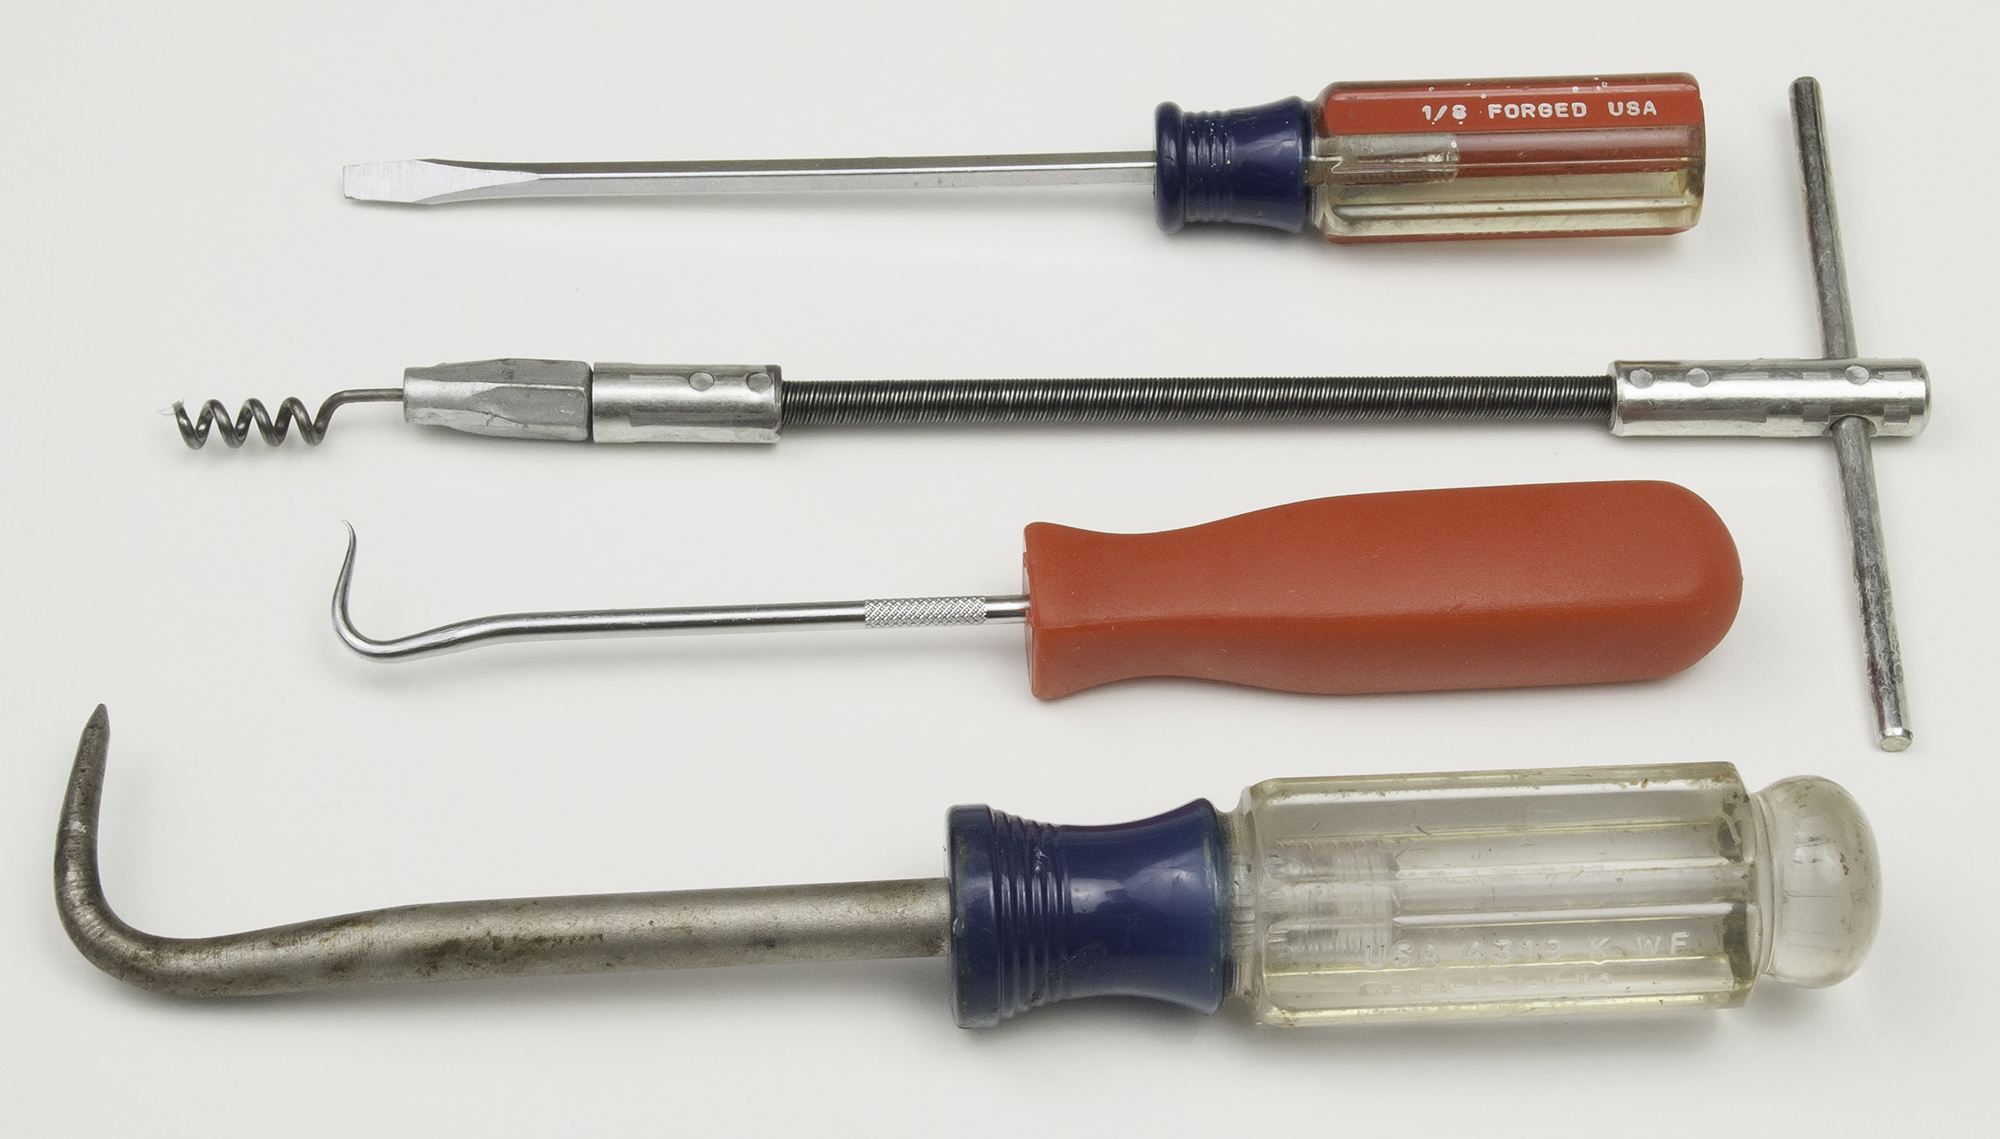
On some stuffing boxes, the single, large nut that slides up the shaft contains the packing. On the type with two studs, the packing sits within the bronze part attached to the hose and stern tube. In either case, dig out all old packing with a screwdriver, hose hook, dental pick or corkscrew-type specialty tool.
Press the new rings in with a blunt tool. A toothbrush handle works. Stagger the joints uniformly around the shaft, and button everything up. Plan to snug the gland tighter again after a few engine hours, once new packing settles in.
In addition to spare packing, keep extra nuts aboard, since they’re easy to drop.
Lip Seals
Lip seals came about with early rotating-shaft machinery. When working properly, they simply don’t drip. On boats, a housing holds a thin rubber seal exactly centered on the rotating propeller shaft. Even if a seal fails entirely, flooding tends to be manageable.
Bigger problems come, though, if required cooling seawater stops flowing through the hose from the engine cooling system. When lip seals overheat, their housing may seize to the shaft and twist apart the stern tube hose, letting the ocean in.
To ensure that cooling water hoses aren’t blocked by chunks of spent engine zinc or barnacle chips, remove the hose from the shaft seal and start the engine. A slow, but unbroken stream of water from the hose, and from the fitting on the shaft seal, is adequate. Ideally, the hose should fill a gallon jug in about a minute with the engine idling.
Over time, grit and sand work their way into lip seals, causing them to drip. These seals also tend not to tolerate a misaligned shaft.
To avoid repetitive problems, glance at the shaft while at cruising speed. “If the shaft seal is orbiting back and forth, that tells me there is an alignment issue or the shaft is bent,” Knight says. Time to call a mechanic.
Stagnant water in stern tubes can also pit shafts and cause seals to leak. On inactive boats, running engines periodically will refresh that stern-tube water. “Aquamet 22 shafts are best with dripless seals,” Knight says, since they are nonmagnetic and less prone to corrosion.
Assuming that spare lip seals are stowed in their collar, already attached to the shaft (usually with two spares in the carrier), replacing a lip seal is straightforward. Just be sure the shaft is shiny-smooth, or you risk nicking the new seal.
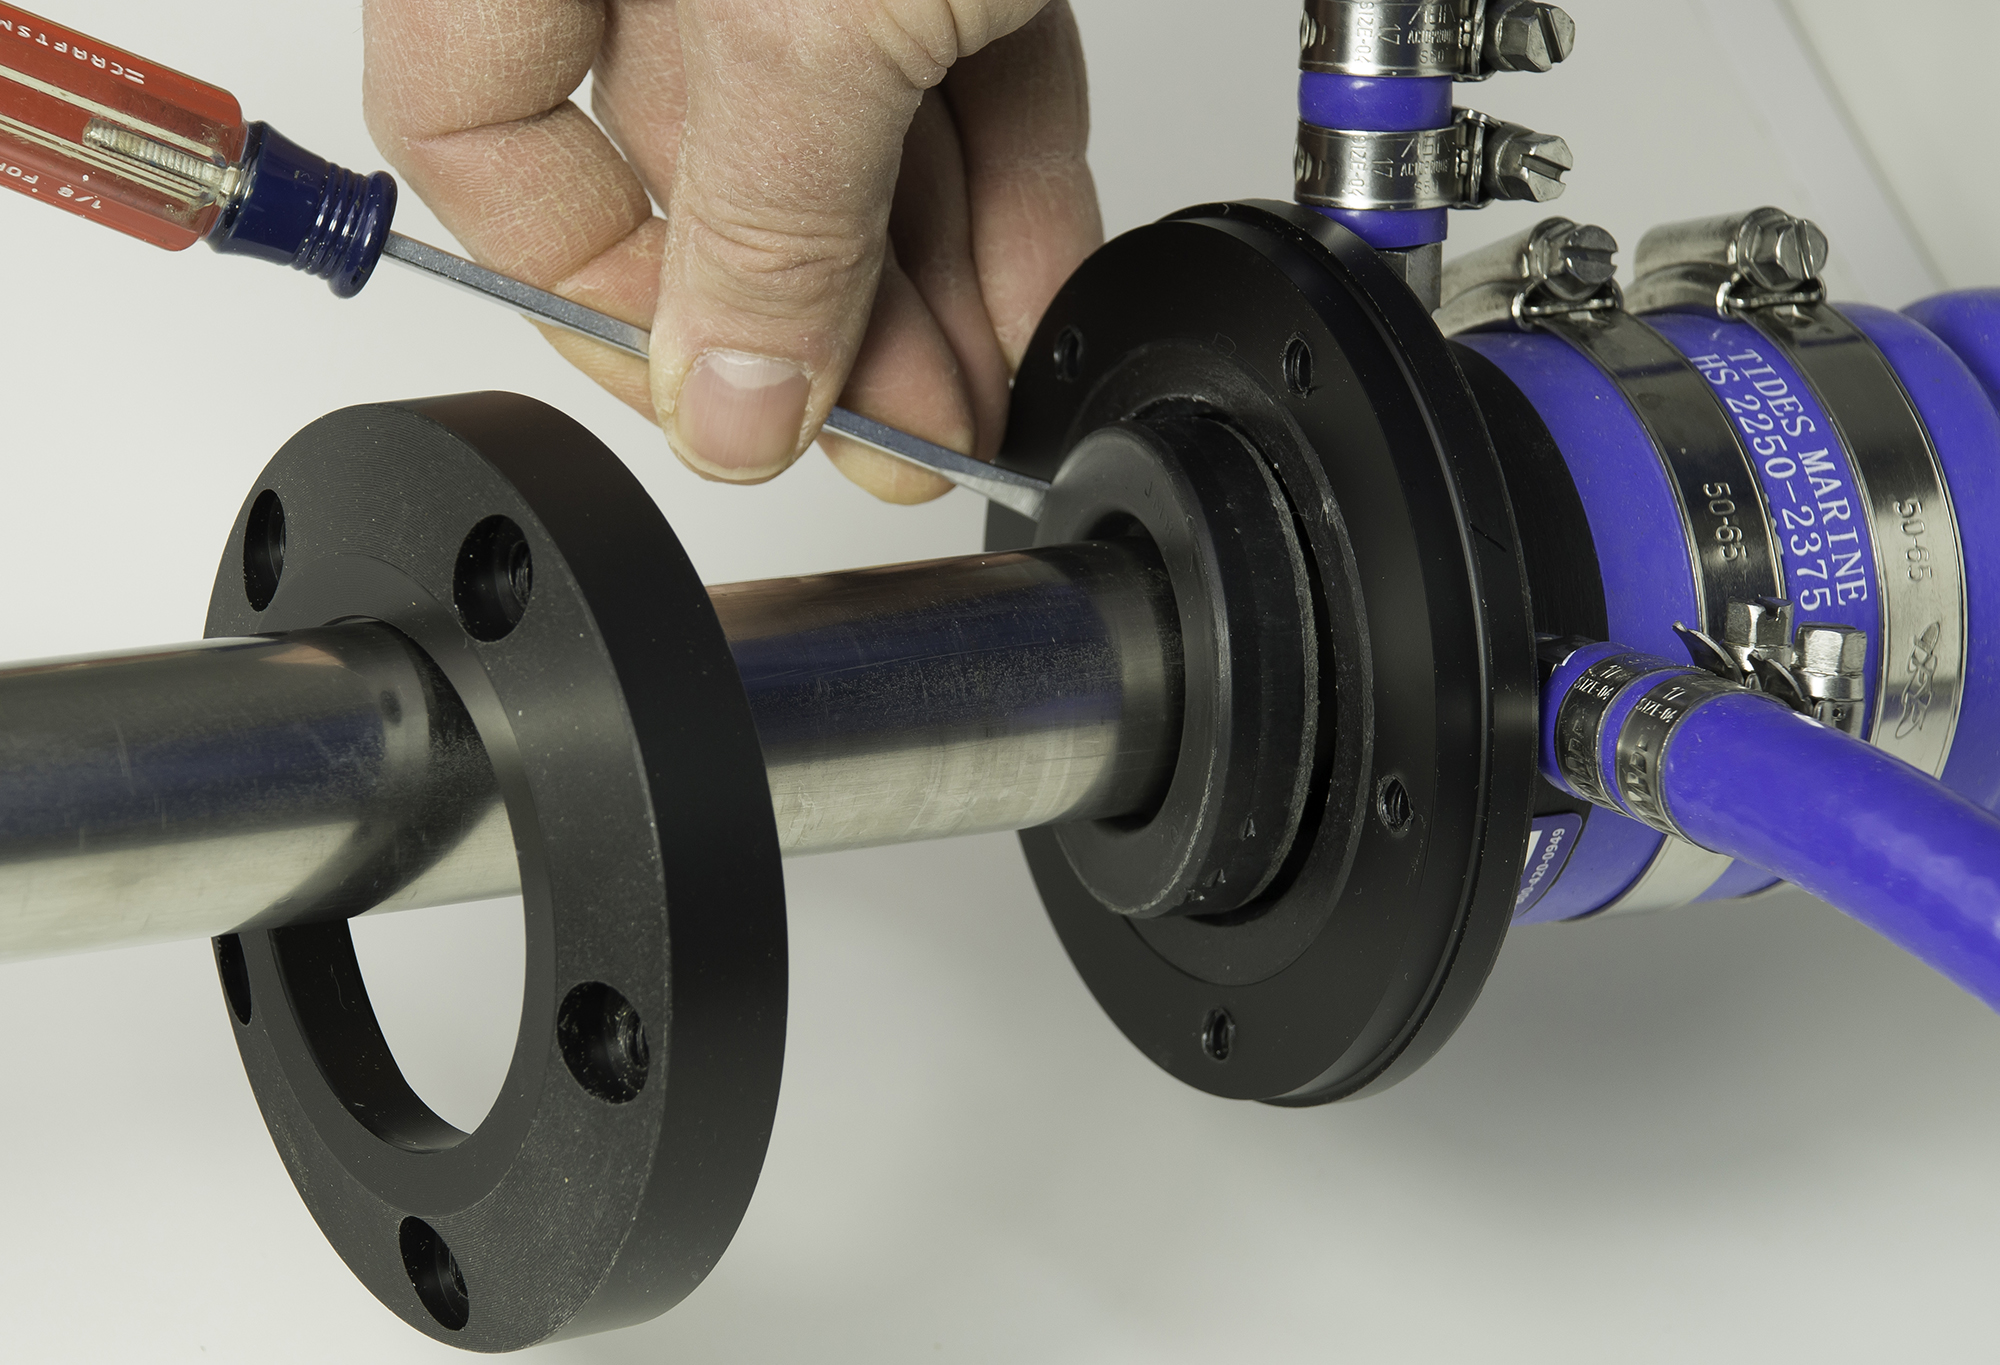
Disassemble the seal’s housing and persuade the old seal out with a small screwdriver, taking care not to mar the housing. Then, cut the seal from around the shaft with wire cutters. Slide the new seal into place, being careful not to damage its thin, rubber edge. Fit the seal evenly into the housing using the split washer and face cap, and then tighten the screws evenly, in a star pattern, to press the seal home.
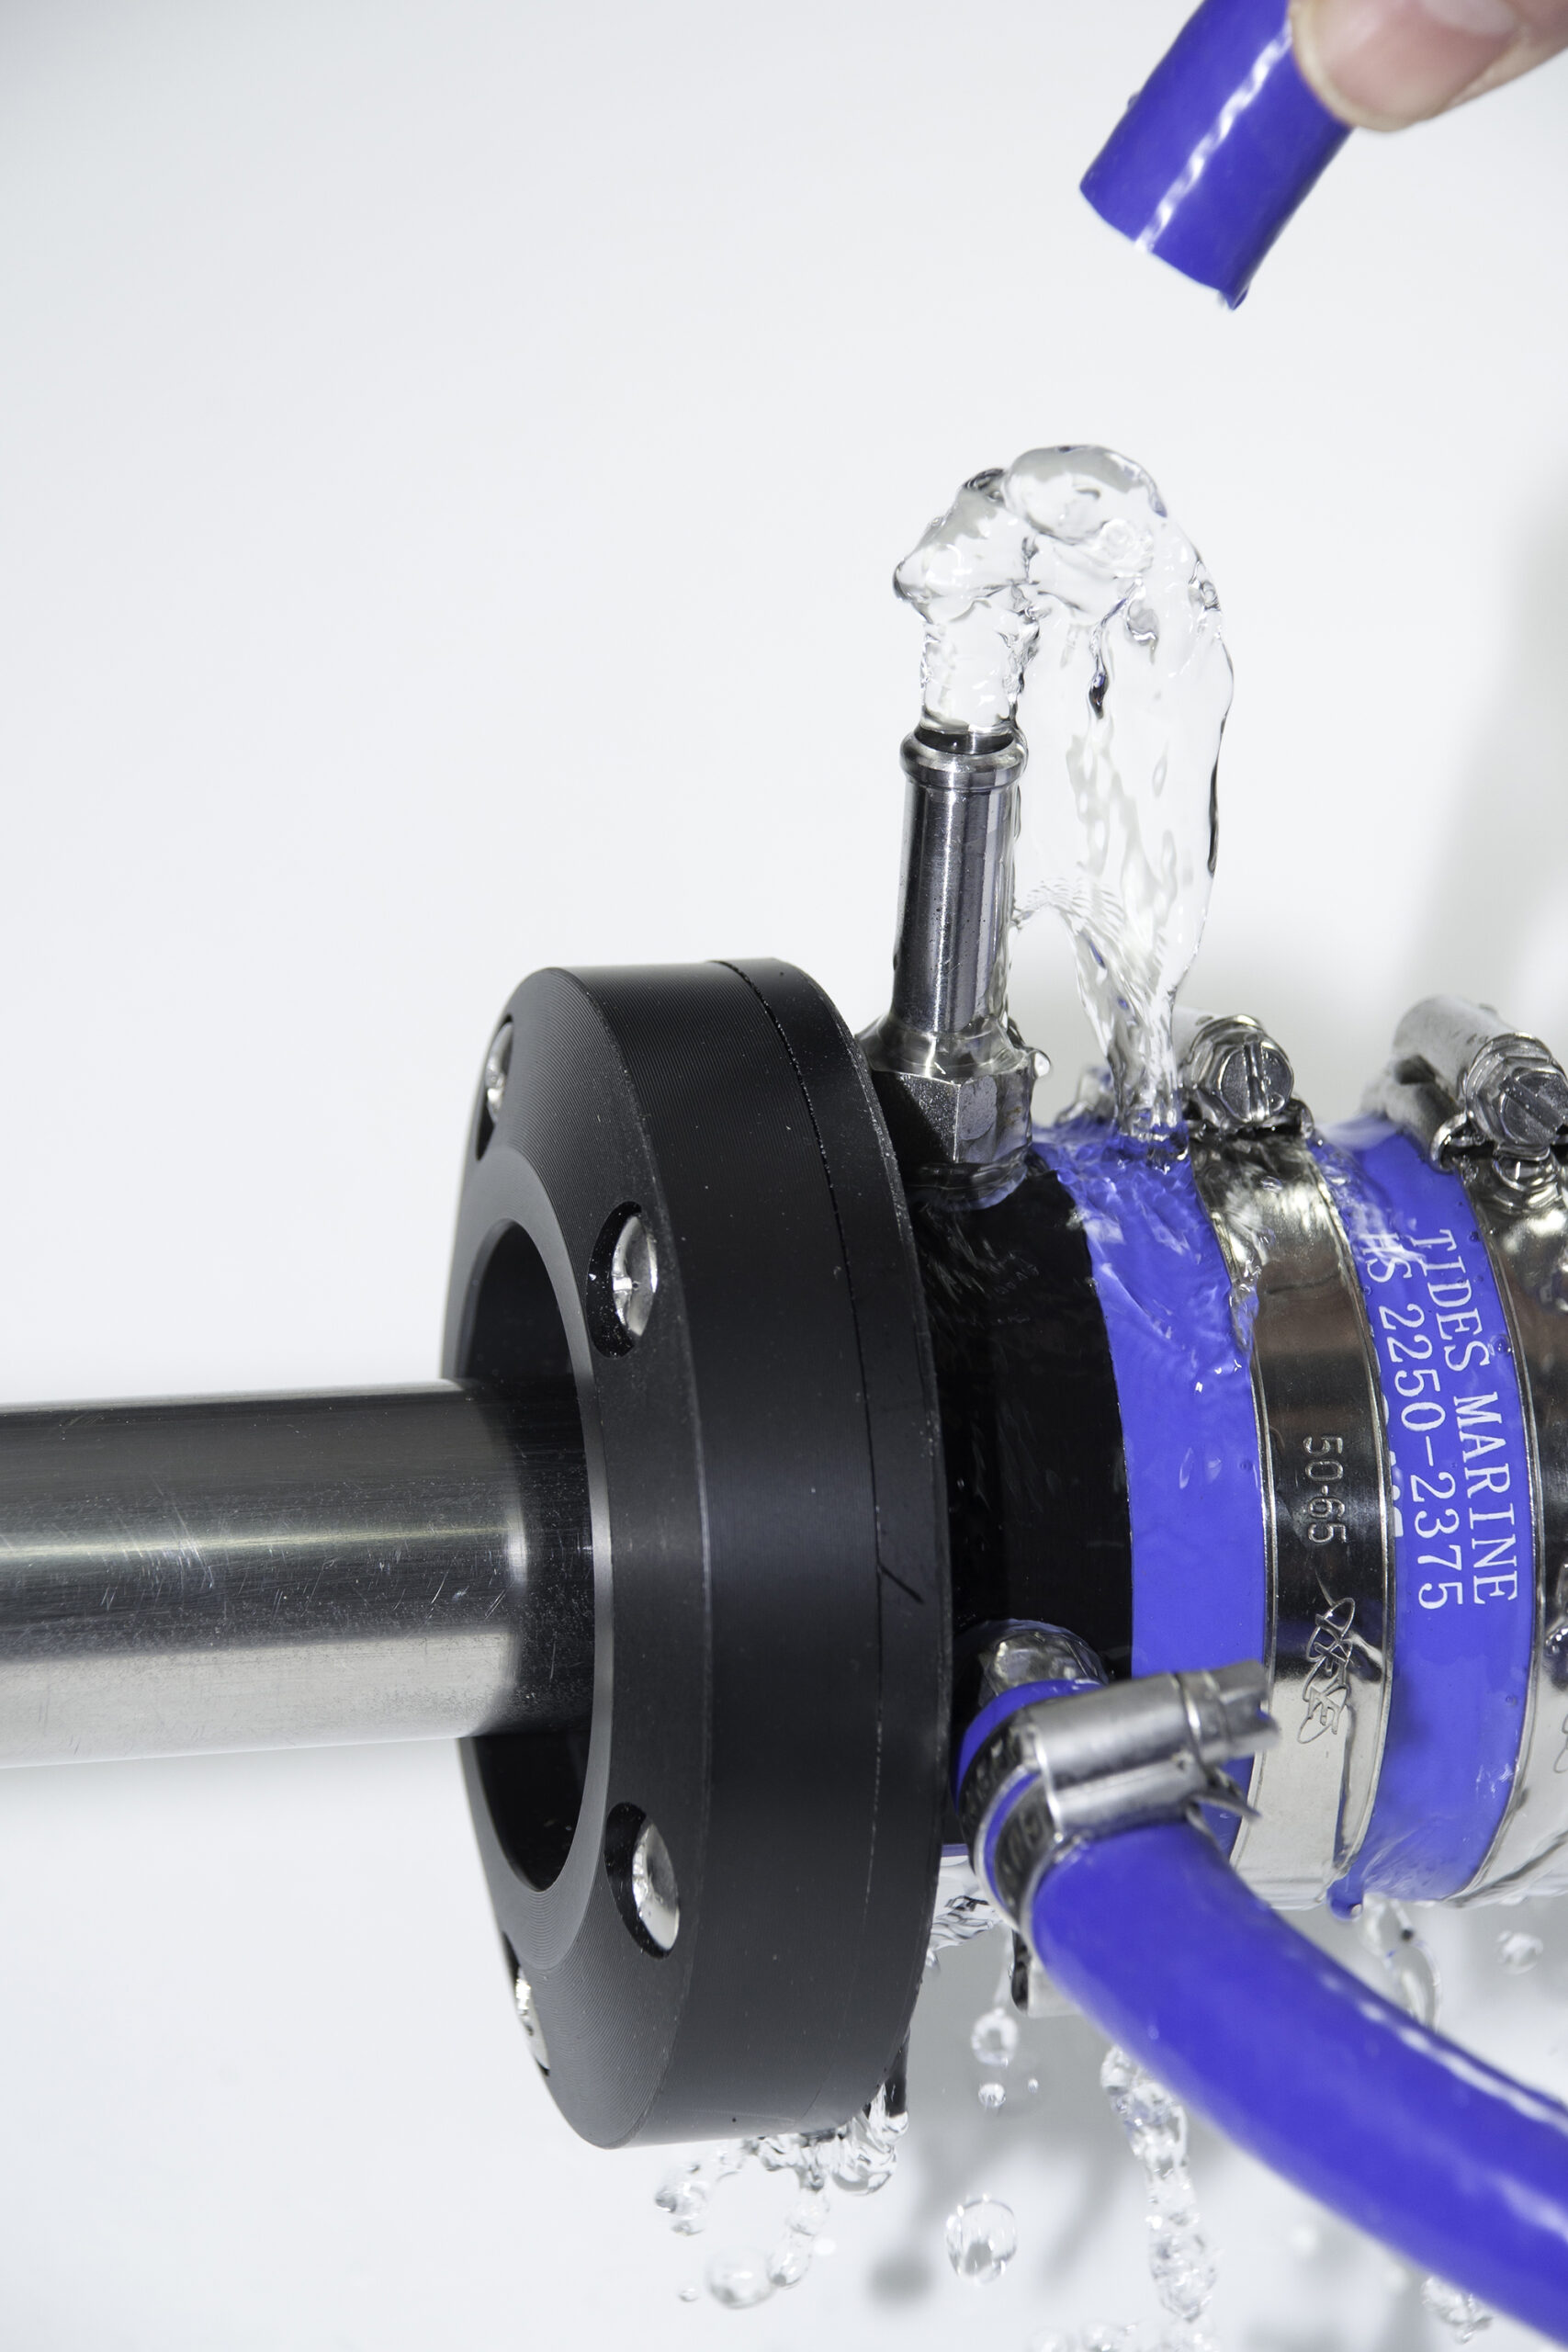
Face Seals
With face seals, an accordion-like bellows connects a carbon graphite composite housing to the stern tube. Springiness in the bellows presses that housing against a rotating stainless steel donut on the shaft (called a rotor). Where stainless meets graphite, polished surfaces provide a watertight seal with no mechanical connection. Face seals rely on engine water cooling, which requires the same attention as lip seals.
Face seals also tend to leak with shaft misalignment. Once that happens, abrasive salt deposits, sand and grit will grind those polished mating surfaces with each shaft revolution. Mild soap and water may help, but never use lubricants or harsh cleaners. Clean faces should repolish themselves. If not, fold a sheet of 600-grit wet sandpaper in half, slip it between the carbon and stainless faces, and pull the sandpaper around the circumference of the shaft a few times.
Increasing pressure between mating surfaces might mitigate a leak. Mark the exact location of the stainless rotor with tape or a marker, and then give it a quarter- or half-inch nudge closer toward the stern. Each hole in the rotor calls for two setscrews: one against the shaft and another atop the first one to lock it down.
Don’t reuse those screws. After the sharp circular edge at the tip is flattened, the setscrew won’t properly bite into the shaft (in a pinch, the outer, locking setscrews might still be sharp). Use thread lock, too.
Ultimately, leaking face seals require replacement, necessitating a haulout and shaft removal.
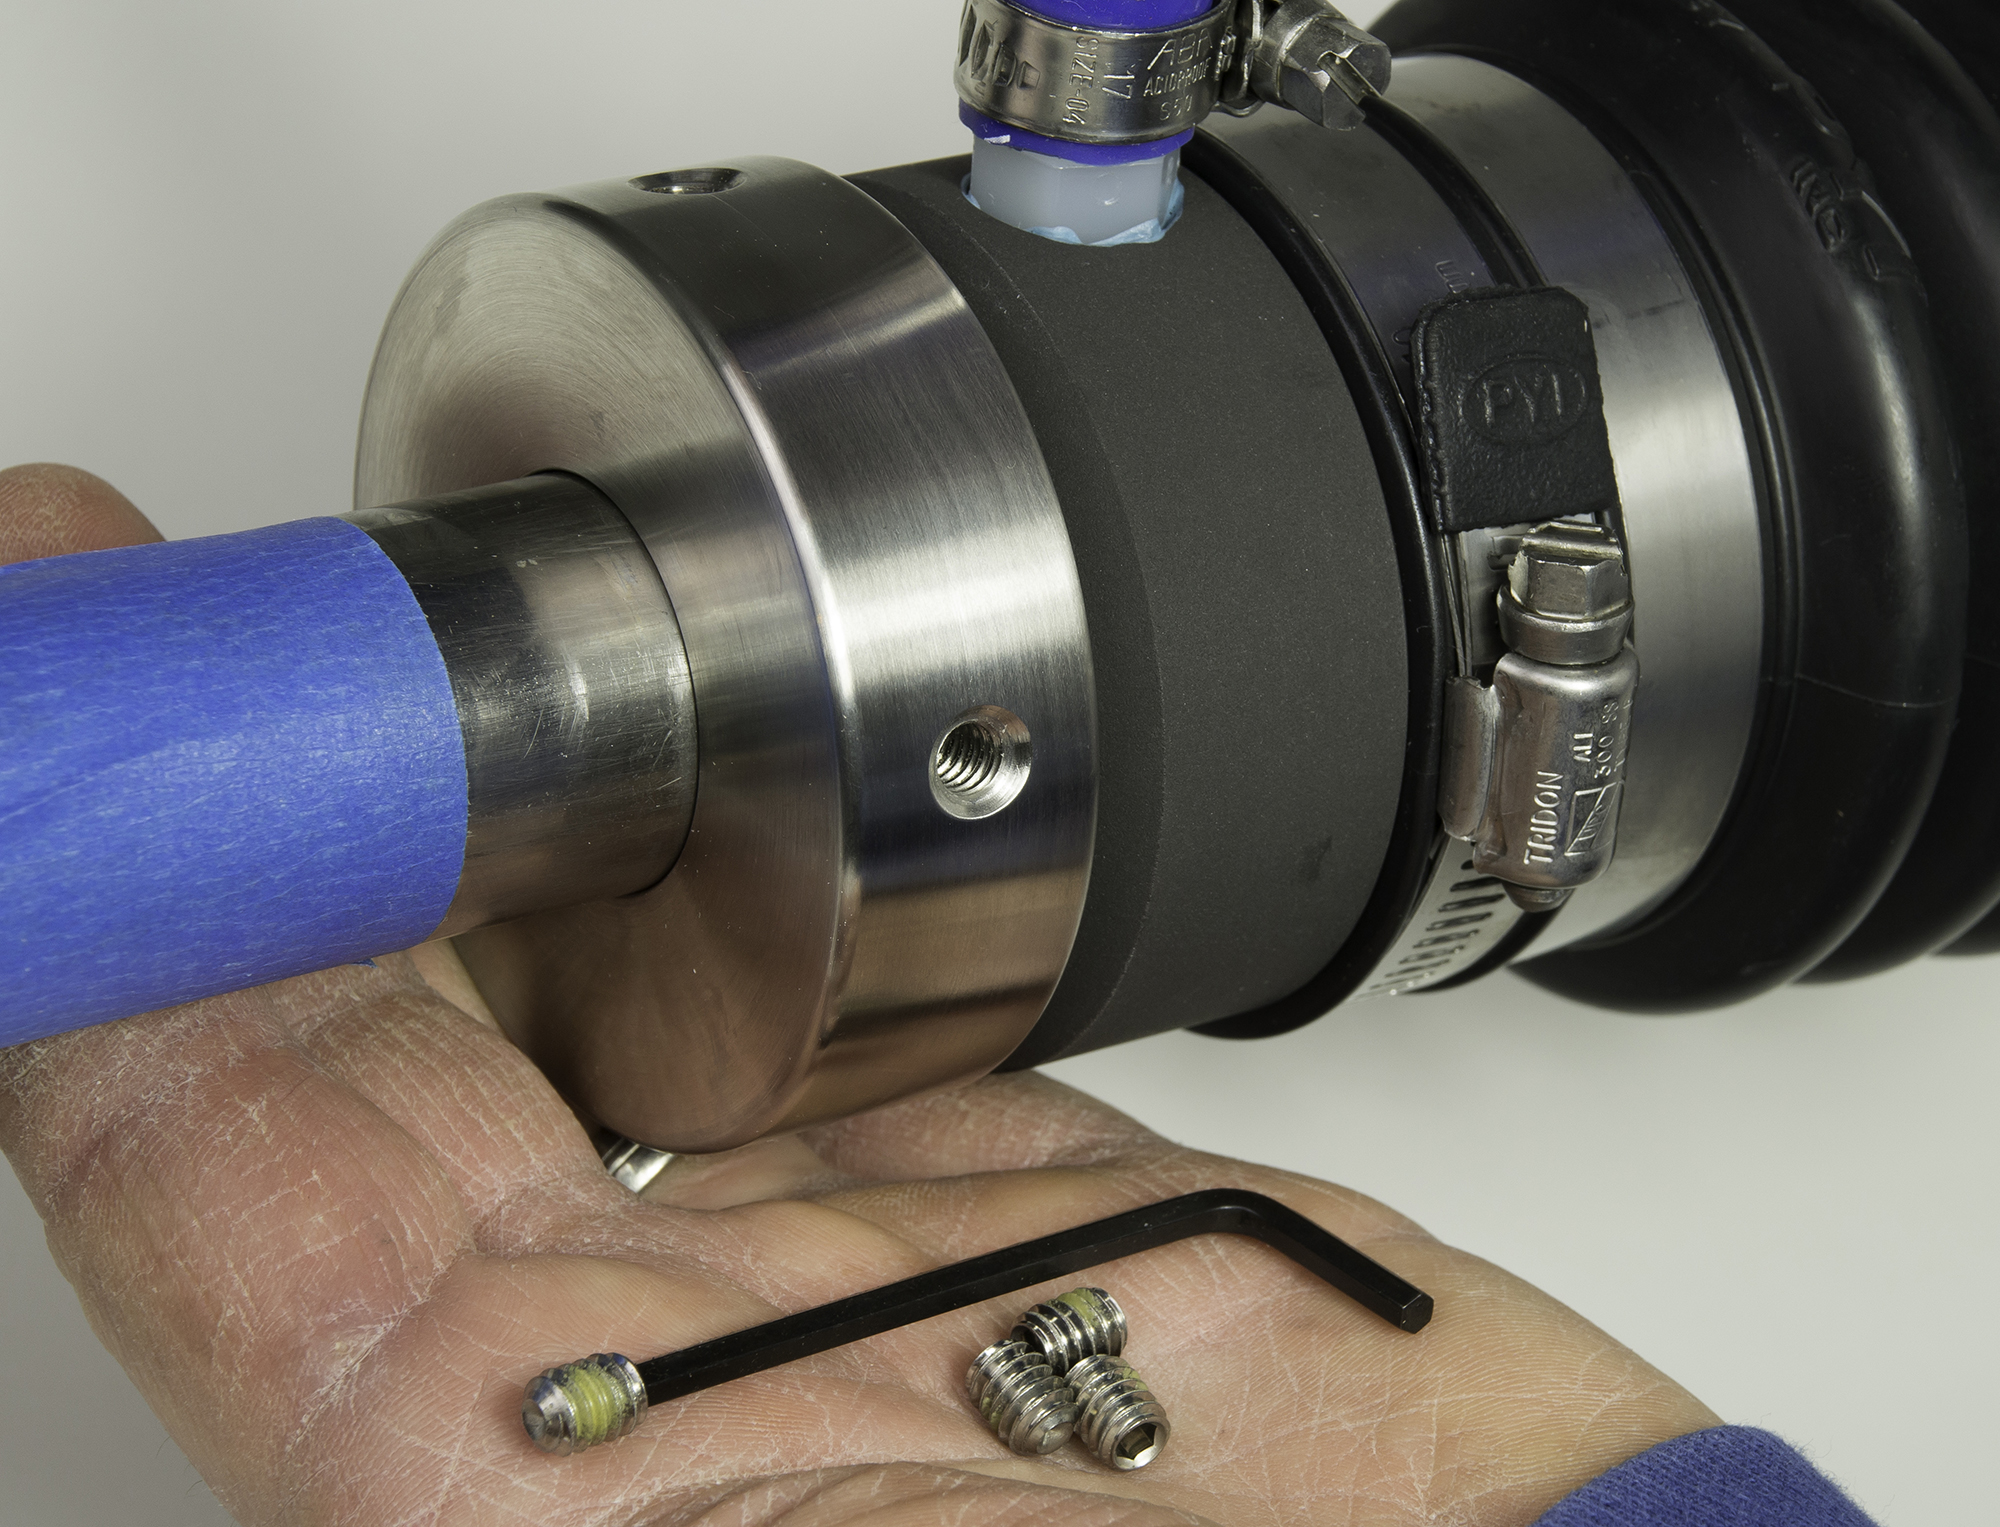 Photo: Vincent Daniello
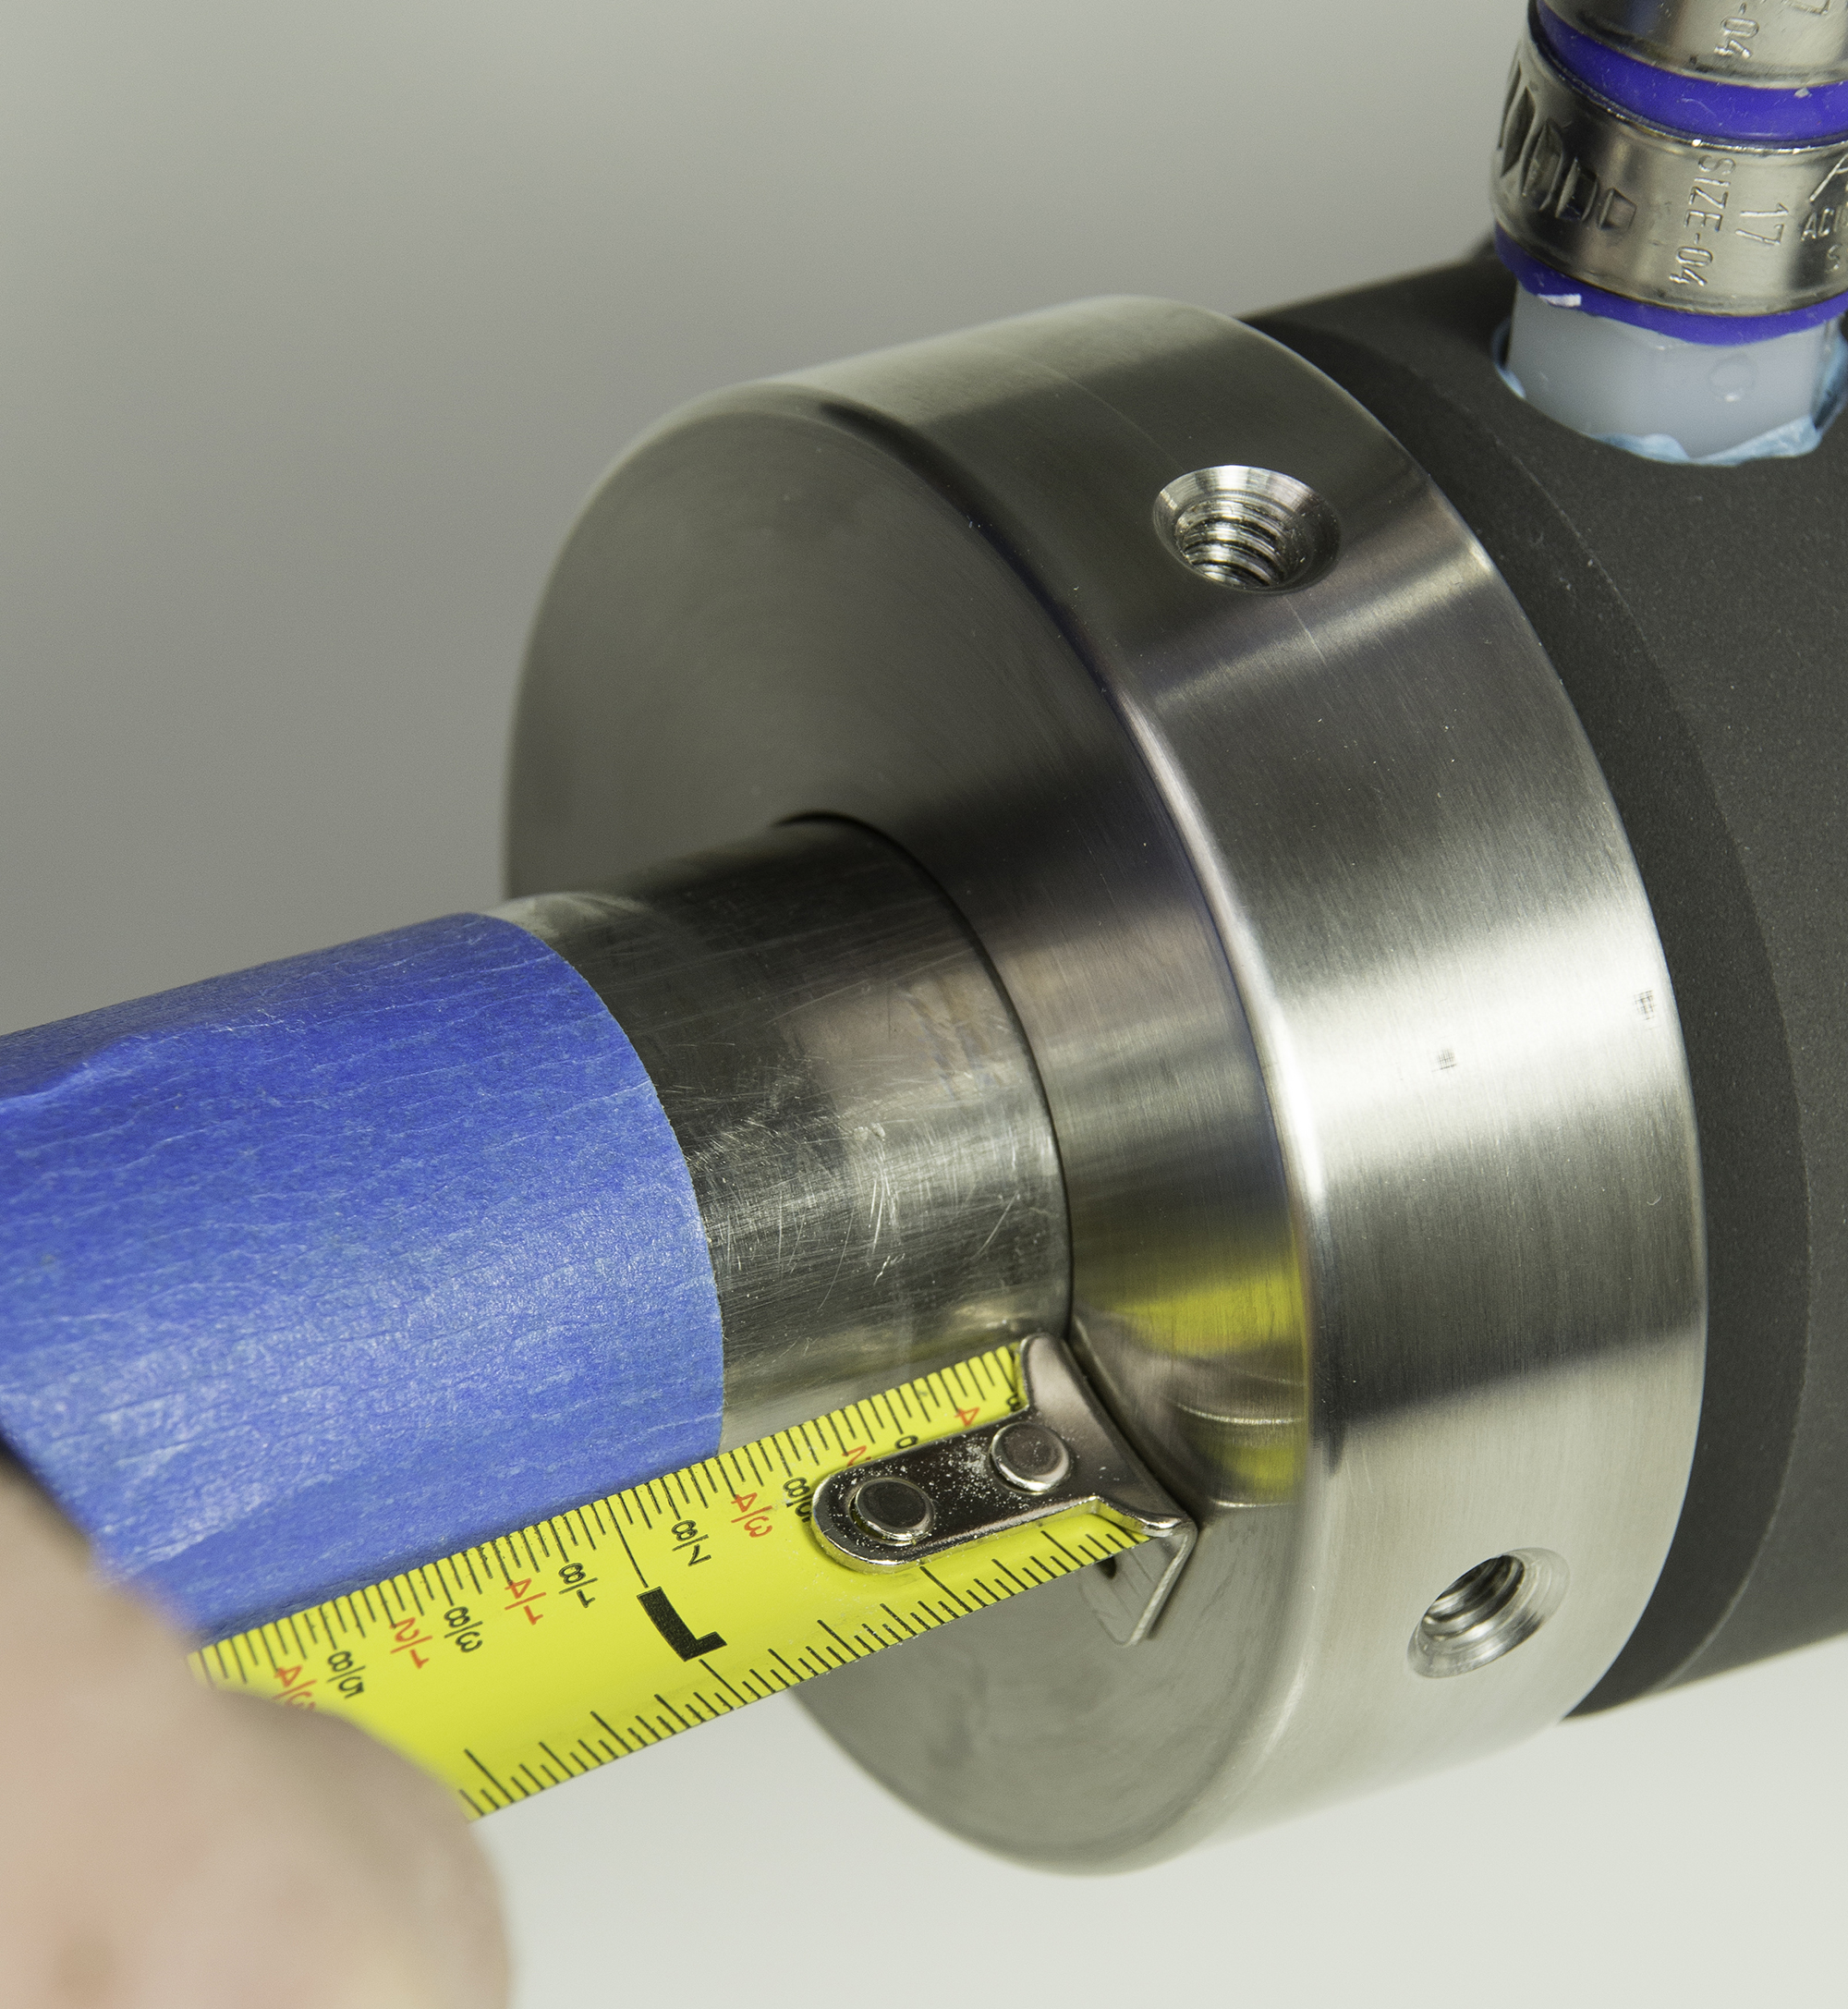 Photo: Vincent Daniello
Universal Concerns
Stuffing boxes, lip seals and face seals are attached to a boat’s stern tube with some sort of hose. Give these hoses the same attention as any other seawater plumbing, with one extra caution, especially on stuffing boxes that always drip: “Hose clamps may look great on top, but look underneath with a mirror and flashlight,” Knight says. “They’re often corroded down there.”
The same holds true for engine seawater feed plumbing and fittings. Ensure that bonding wires make sound connections to bronze components, too.
“People put in a dripless seal and think they don’t have to worry, and they get neglected underneath the engine room floorboards,” Knight says. With any shaft seal, he adds, “You can’t put them down there and not make that a regular inspection point.”
Emergency Repair
If a shaft seal fails and the boat is on the line, first keep the shaft from rotating from the boat’s forward motion by clamping two pipe wrenches, opposing each other, onto the shaft. Lash the wrench handles together, and lay them against a stringer.
To stop the flooding, wrap a bicycle tire inner tube around the shaft, close to whatever remains of the shaft seal, and continue like a bandage across the opening, sealing water out. Hose clamps, tie wraps or line strengthen the repair.


