We purchased a new (to us, at least) 31-foot Downeast type cruiser last year. After looking all through the northeast, we found one here high and dry in Ohio. She had been for sale for a couple of years and was in need of some serious TLC so we had her trucked back to Maryland and began major renovations.
One of our concerns was the condition of the fuel. There was about 75 gallons in two aluminum tanks with a total capacity of 160 gallons. The fuel had been sitting in half-empty tanks for a few years. One of the first things I did was sample the fuel, drawing samples from the bottom of both tanks. Then, I let the fuel sit for a few days in small glass jars to see what settled out. No water precipitated out and just a small bit of particulate accumulated on the bottom, so we assumed that the fuel would probably be OK with a good dose of additive.
Come spring the work was completed and she was launched. The filter, oil, and both the primary Racor 500 series with a 30-micron filter and the secondary filter on the Volvo engine were changed. Off we went on a 4-hour run from Yacht Maintenance Co. in Cambridge, Maryland to St. Michaels, Maryland, our home port. As soon as we tied up, I opened the filter and checked the element to find it clean with no sign of water in the sight bowl at the bottom of the filter.
It looked like fuel would not be a problem. For the next two months, we cruised the boat around our home waters, encountering some choppy water on several occasions so the fuel got sloshed about in the half empty tanks. When I checked the filter, it looked OK—a little dark, but nothing unusual.
THE PROBLEM
In the fall, we planned a longer cruise and took on 60 gallons of new fuel. We packed up the boat and in less than six hours of running time, the engine began to lose rpms so we limped into Rock Hall and I pulled the filter. It was packed with dirt. We had plenty of extra filters so I cleaned out the filter and replaced the 30-micron element. Six hours later the same routine: I changed the filter, but this time the secondary filter on the engine was dirty and had to be changed.
When we got home I decided to replace the Racor 500 series with a 900 series filter. Even though the boat uses less than 3gph I always felt that this was on the small side for a 140hp engine. I had replaced the same sized filters with larger 900 ones on a trawler and never had a filter issue in over 25,000 miles of cruising.
We had planned a trip on the ICW to Florida so we took the boat back to Yacht Maintenance Co. to have the fuel polished and to try to clean up the mess in the tanks. After two hours of circulating the fuel, large chunks of sediment collected in the first stage of the filter system. This problem was not dirty fuel, it was sediment in the bottom of the tank that apparently was stirred up by adding new fuel. Polishing was not going to clean up this mess, so we canceled our plans to go south, had the yard haul the boat, and decided to tackle the issue in the winter.
THE RUBE GOLDBERG SOLUTION
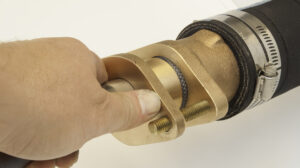
We left the yard after discussing several options: removing the tanks, cutting inspection ports, cleaning, and/or replacing the tanks. Maybe the engine had to come out, maybe not. Any of the scenarios sounded expensive. I did some research on the Internet and came across a company, Seabuilt that makes a cleanout/inspection port for diesel fuel tanks. I downloaded the information and specs for the Seabuilt 10-inch access plate system and found that the yard was familiar with the product. We checked with a local surveyor and asked if there would be a problem putting the inspection port in the side of the tank. We learned it was not a problem with diesel, but it would be a problem with gas.
The tanks have baffles that divided the tanks into thirds so we decided to install a single port in the center section of the tank. A plan was made and I decided that the yard should cut the opening in the sides of the aluminum tanks for the 10-inch port since they have the tools and expertise. I would then clean out the tanks, especially the area behind the baffles.
THE MINI FUEL POLISHER
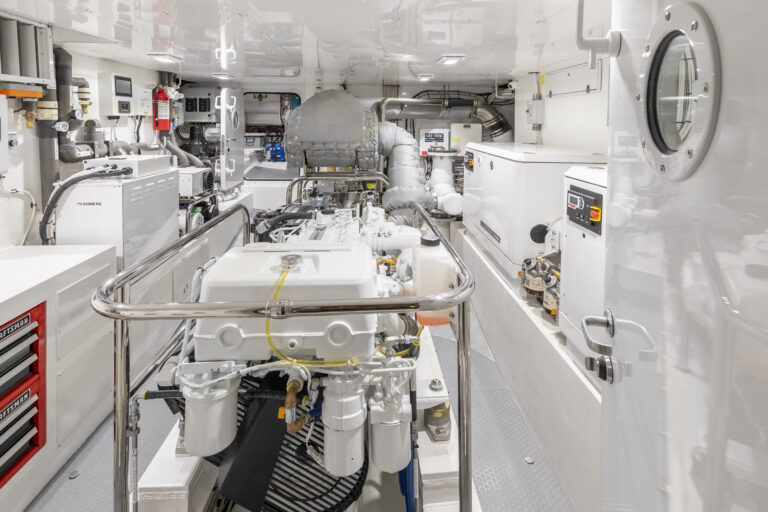
After the ports were cut, I could reach deep into the tank and clean the center section but the baffles were solid with small cutouts at the corners and in the center to allow the fuel to flow, but not slosh back and forth in large amounts. The only option besides adding more ports was to spray diesel fuel through the openings in the baffle hoping to dislodge and flush out the gunk at the bottom of the tank.
I had installed a 900 series filter so I had the basic components of a fuel polishing system, but a pump to circulate the fuel was needed. I ordered a JABSCO Water Puppy and replaced the neoprene impeller that came with the pump with a nitrile impeller designed to pump fuel. I removed the fuel line from the filter to the engine and replaced it with a section of 3/8-inch fuel line leading to the pump. On the output side of the pump I attached a 6-foot section of 3/8-inch tubing leading to a piece of 3/8-in. copper pipe. The end of the pipe was bent 90 degrees and crimped to form a nozzle for a wand. I spliced on some wire to the pump then put a 15-amp fuse holder and fuse in the line along with a switch. Large alligator clips hooked the pump to the batteries.
I replaced the element in the filter, shut the fuel off from one of the tanks, and poured 3 gallons of fuel into the other tank. I started the pump and was surprised at how much force it developed. Then I did a bit of experimenting with the nozzle to get as much flow while maintaining a strong jet.
The last piece of the puzzle was to make a light so I could see what was going on in the tank. A flashlight worked, but was difficult to hold while directing the flushing wand. I went to the local hardware store and found a small diode light designed to be mounted inside a cabinet. I put the light on a piece of brick to hold it in place and then I put both into a large plastic Ziploc bag and taped it to hold it together. The three diodes provided just the right amount of illumination so I could see what was going on inside the tank.
The copper wand fit through the openings in the baffles and by working it back and forth I could direct the jet to the top and sides of the tank and blast the gunk at the bottom. With the fuel flowing, you could see the junk flow out of the baffled area. The fuel then went through the filter and back into the tank. With the resistance of the nozzle and filter, the pump was probably pumping 2 to 3 gallons per minute, at best. But at this rate the entire content of the tank went through the filter every couple of minutes. A lot of the crud settled in the bottom of the filter, but the filter did not clog and stop the flow.
Every 15 minutes I turned off the pump to allow the heavy dirt and small chunks to fall to the floor of the center chamber. Then, I’d pump the tank dry by putting the copper tube into a large container outside the tank, and turn the pump back on. With the tank dry, I could mop up the sediment with paper towels.
The process continued: Dump the fuel back into the tank, flip on the pump, and start flushing again. After a few hours of flushing, less and less crud flowed out from behind the baffles. The difficult part of this operation was crouching next to the tanks in the cramped aft section of the engine room. The cold got to my old bones, so I had the yard finish flushing the other tank and install the cover plates on the ports. I think we got 80 percent of the sediment out of the tanks and the 900 filter can handle the rest.
The inspection ports designed for a retrofit and my Rube Goldberg rig got the job done. The other alternative to remove the tanks, and possibly the engine, makes a few days fiddling with a pump and crouching in a cold engine room worth it.
PMM’s Technical Editor, Steve D’Antonio notes:
Rube Goldberg can play an important and successful role as a crew member aboard your vessel, his skills with duct tape, Vice Grips, wire ties and epoxy are nothing short of amazing. In this case, he lived up to his reputation of being adaptable to a changing environment. In hindsight, however, there are a few caveats that are worth mentioning. First, pump snot designed to convey fuel should never be used for the purpose, regardless of the composition of the impeller. While it is less volatile and less likely to explode than gasoline, stick with proprietary fuel pumps for applications that involve this flammable liquid. Second, copper and aluminum are arch enemies and the latter is always the loser whenever they do battle. While using a copper tube to spray fuel around an aluminum tank, this wand-like device will invariably make contact with the tank, leaving behind copper particles that, in the presence of water, may lead to severe tank corrosion in the future. Generally, when tanks are pumped out or serviced in this manner, plumbing components should be aluminum, stainless steel or non-metallic. Finally, the preferred alternative would have involved installation of inspection ports into each and every baffled chamber, doing so would have afforded ample access, there by ensuring a completely clean tank that could be cleaned in the future, and would have negated the need for Rube’s “pressure washer”.


